Why John Guest Fittings are the Choice of Professional Plumbers

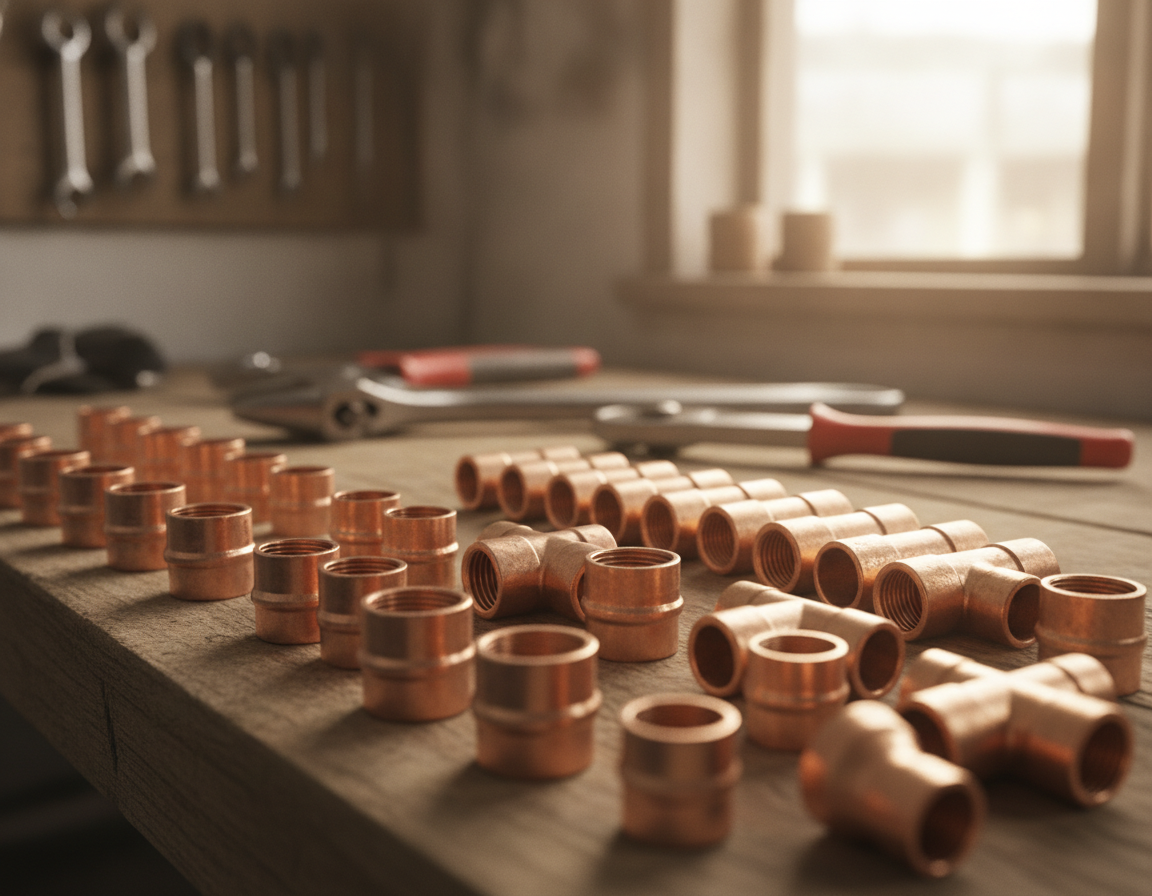
John Guest offers a large selection of plumbing fittings, valves, tubing, and accessories for many different uses. These include residential, commercial, and vehicle fluid systems. Its strong focus on push-fit plumbing solutions emphasizes simplicity and speed. This makes them a trusted solution among contractors and DIY enthusiasts in the United States.


These components are made with plastics and produced to tight tolerances. That helps provide strong durability and dependable use in drinking water applications. The system helps reduce installation time and labor costs, delivering performance under daily use.

John Guest Fittings Distributors plus ecommerce retailers offer the product line extensively. The U.S.-based shop Installation Parts Supply carries John Guest items. That makes possible quick ordering and convenient delivery to installers and hobbyists alike.

Main Points

  • John Guest Fittings combine tool-free plumbing convenience with long-lasting, food-safe materials.
  • John Guest components support home plumbing, RV systems, and commercial installs where speed matters.
  • Broad availability through John Guest Fittings Distributors and online stores streamlines purchasing.
  • Use of engineered plastics helps meet drinking water and longevity requirements.
  • Installation Parts Supply is a useful U.S.-based retailer for genuine John Guest products.

John Guest Fittings Distributors

The Importance Of John Guest Innovation In Plumbing

John Guest innovation revolutionized plumbing by introducing secure connections that are both quick and simple. The transition from solder and threaded joins significantly reduced installation time and cut down potential leaks on active sites. This approach was quickly accepted by trade professionals in the United States and abroad, thanks to the repeatable results it delivers under routine pressures.

The brand’s development began in 1961, introducing a groundbreaking push-fit concept for compressed air and telecoms. This early innovation evolved into the Speedfit push-fit plumbing systems used today in a wide range of applications. The connection relies on a stainless steel gripping ring and an O-ring seal, creating permanent, leakproof joints without the need for special tools.

Centralized research, development, and manufacturing ensure consistent product quality. This work is carried out in purpose-built facilities in West London and Maidenhead, Berkshire. That structure allows engineers to oversee each stage from prototype to production, ensuring performance targets and consistency are met.

John Guest supports engineers and installers to aid engineers and installers in laying out systems with confidence. Services include CAD drawings, recommended pipe layouts, flow rate guidance, and commissioning advice. This guidance can limit errors on site and support faster completion for contractors working with John Guest fittings.

Original equipment manufacturers depend on the brand for various applications due to detailed quality control and validation. Products are produced under ISO 9001 processes, and products undergo detailed testing before release. This consistency makes John Guest Fittings Distributors a preferred source for contractors seeking certified parts and consistent supply.

Area Key Benefit Field Result
Push-fit fitting system Tool-free, fast joints with stainless gripping and O-ring seal Faster installs, fewer leaks, lower labor costs
Integrated research and manufacturing Consistent control from prototype to finished part Reliable quality plus faster product improvement
Installer support Planning drawings, flow-rate help, and commissioning advice Lower error risk and smoother handover
Market adoption Used by beverage, automotive, and building service OEMs Field-proven use across challenging sectors
Authorized supply network Verified channels for authentic components Consistent access through approved distributors

Using authentic components reduces the risk of mismatched seals and helps limit rework. Buyers using verified John Guest Fittings Distributors gain access to genuine products and documented support. This sourcing method supports warranties and upholds system integrity when Speedfit push-fit solutions are installed.

Even with tight budgets, the long-term savings in labor and reduced downtime can support the use of John Guest products. John Guest’s long record of practical innovation and field-proven performance continues guiding modern plumbing practice. Correct brand references and mistaken spellings, ohn Guess Fittings, appear in informal references.

How John Guest Components Support Long-Term Performance

John Guest designs and produces fittings and pipe systems for long-term use. John Guest relies on food-safe polymers for water and Polybutylene-1 PB-1 for Speedfit-compatible pipes. This provides lightweight, flexible tubing that helps resist corrosion and is safe for hot water.

PB-1 pipe is easy for installers to work with, has low memory, and is layflat. The material also offers low thermal conductivity, keeping water temperature stable. The material may reduce noise levels and is lead-free, meeting current health standards.

Speedfit products are made for durable use. Many components are intended to last up to 50 years. Some product lines include a 25-year guarantee, supporting confidence that they perform well under normal conditions.

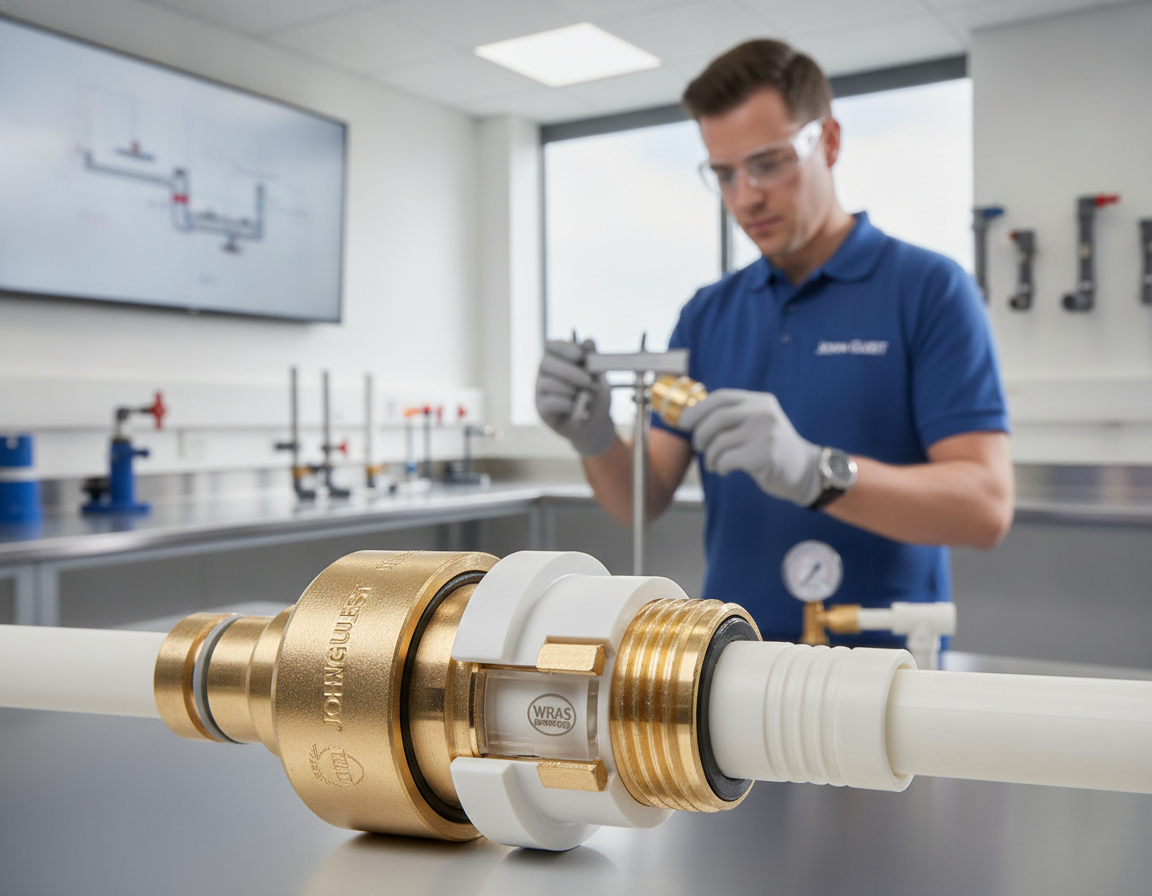
The brand’s products are produced to recognized standards. Production follows ISO 9001 management and have WRAS approval for potable water use. The product range also includes the Kitemark BS7291, demonstrating compliance and traceability.

Third-party recognition improves buyer confidence. British Gas has recognized JG Layflat PB-1 pipe for UK installations. This supports trust among contractors and specifiers in the U.S.

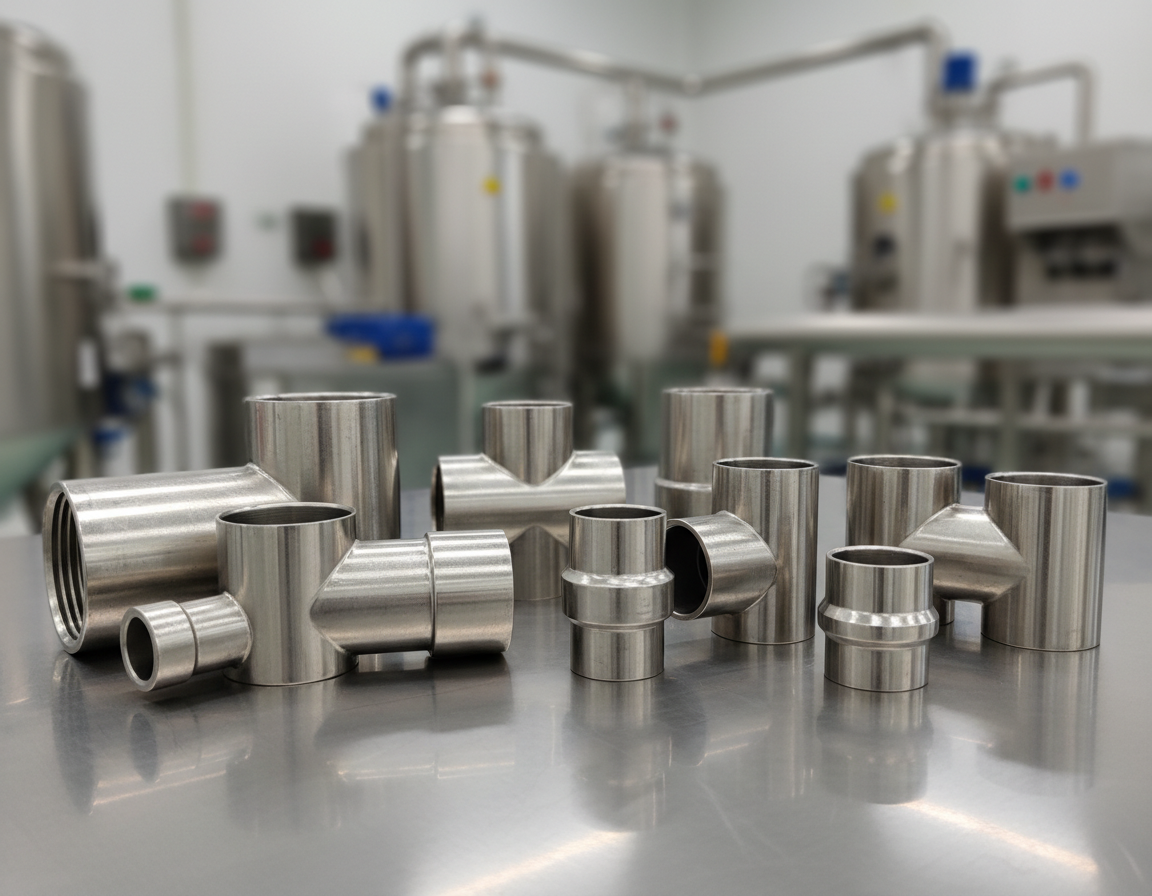
The John Guest catalog includes many products. Its catalog includes 3,000-plus products, including plumbing fittings, MDPE push-fit ranges, flexi hoses, and underfloor heating components. This range makes possible complete system supply, not just single parts.

Recognized approvals, selected materials, and tested service lives give professionals confidence in Speedfit systems. These approvals provide clear evidence. Strong polymer engineering and PB-1 materials help provide the promised Speedfit life expectancy for many installations.

Installation Benefits: Speed, Simplicity, And Reduced Labor

Today’s plumbing projects gain real advantages from quick, reliable connections. Push-fit fitting provides a practical advantage over soldered or crimped joints. That connection style reduces time on site and eliminates the need for specialized tools.

Push-fit installation is simple, direct, and tool-free. Start by cutting the semi-rigid pipe square with a pipe cutter. Next, press the pipe firmly into the fitting until it reaches the internal stop. Gently pull back to engage the grip ring and confirm the O-ring seal. For disassembly, push in the collet and pull out the pipe.

Speedfit installation eliminates the need for soldering, compression tools, clips, clamps, or sealants for standard connections. Fittings are demountable and reusable. That makes DIY work easier and speeds up professional plumbing work.

The installation savings are often meaningful. These connections may reduce by half the time needed for common runs. This reduction in time leads to lower onsite labor costs and faster project completion for contractors using John Guest products.

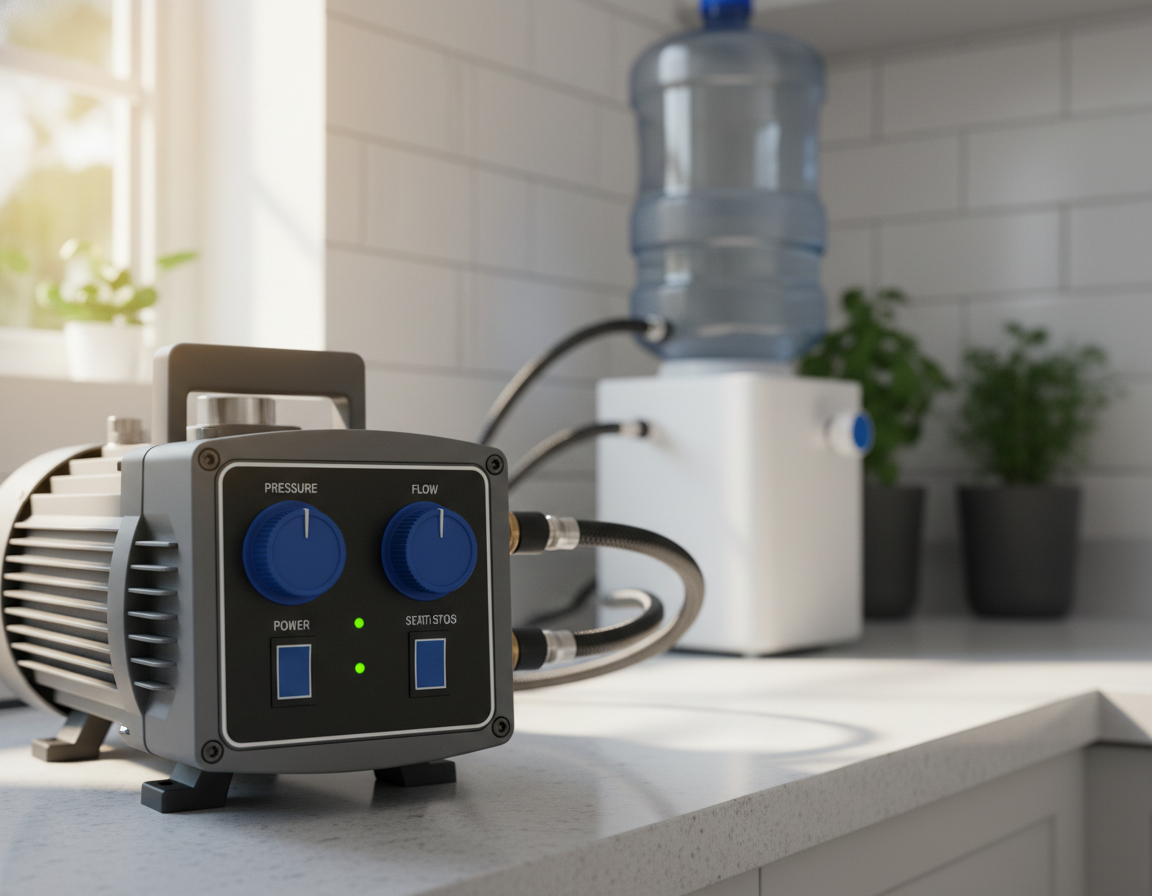
Numerous systems benefit from quick fitting. Typical uses include domestic hot and cold water, central heating systems, and underfloor heating with PB-1 layflat pipe. Campervan and RV water systems also benefit from compact, serviceable joints.

Commercial installations, drinks dispensing, and pneumatic systems also benefit from rapid reconfiguration. Removable fittings enable quick repairs and system changes without major disruption. Contractors can rework system layouts on the fly when using John Guest components.

Using real components is essential for dependable results. John Guest Fittings Distributors stock certified components that meet industry standards. Be alert for mistaken names such as ohn Guess Fittings; always check packaging and supplier credentials when sourcing parts.

Installation Factor Push-Fit Method Older Installation Methods
Tool needs Most connections need only a pipe cutter Torch, compression tools, or crimping tools
Job speed Fast fitting and possible reuse Usually slower because tools and setup are required
Demountability Demountable and reusable fittings Usually permanent and may require replacement
Most suitable for Residential, mobile, underfloor, and commercial systems Legacy systems or high-pressure applications needing specific joins
Distributor note Available from approved John Guest Fittings Distributors Available widely, though certification needs checking

John Guest Compared With Alternative Fittings And Systems

Choosing the right fitting changes installation speed, reliability, and long-term performance. This section explores the trade-offs between John Guest push-fit solutions and barbed hose fittings. The comparison also covers the advantages of Speedfit systems paired with PB-1 pipe.

John Guest push-fit fittings are designed for semi-rigid tubing, such as Speedfit PB-1 and PEX. Each fitting relies on stainless steel teeth and an O-ring seal for a tool-free connection. That makes the installation process faster and more efficient, well suited to tight spaces and retrofit work.

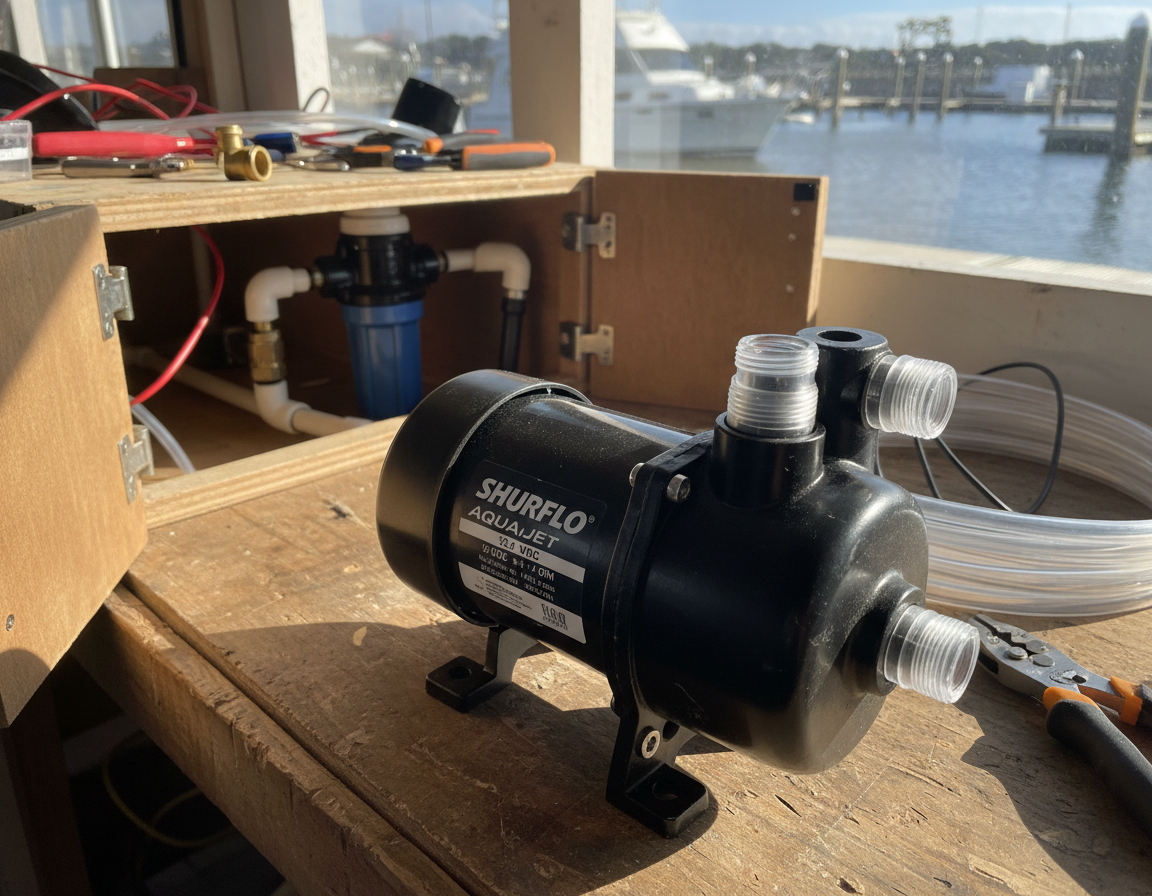
Barbed fittings, on the other hand, are best suited for flexible hose and require clamps or jubilee clips for a secure connection. This mechanical clamping approach gives high mechanical strength, making it useful for high-vibration or external hose applications. Technicians commonly choose barbed fittings at pumps or tanks where hose flexibility and movement are expected.

On real jobs, mixed connection systems are often used. Many systems use barbed fittings at pump outlets and tank connections. Then, it transitions to John Guest push-fit behind cabinets for a neat, serviceable run. This combination balances flexibility, vibration resistance, and the clean look of Speedfit installations.

The benefits of PB-1 include long coil lengths that reduce joints and layflat behavior for easier threading through joists. PB-1 can remain more flexible when temperatures drop and has low thermal conductivity for hot water, improving energy performance. PB-1 is lead-free and non-toxic, providing acoustic advantages over some alternatives.

When choosing between push-fit and barbed connections, consider the pipe type, vibration exposure, and the need for future reconfiguration. In new construction, Speedfit plus PB-1 benefits often reduce labor time and joint count. For vehicles or high-vibration setups, barbed fittings with clamps are a safer choice.

Sourcing authentic components is essential. Choose verified John Guest Fittings Distributors to ensure product authenticity and warranty coverage. Be cautious of mislabeling; the market sometimes lists incorrect products, such as ohn Guess Fittings that mimic established brands.

Trusted John Guest Distributors And Buying Sources In The United States

Real components are essential for reliable plumbing work. Opt for authorized John Guest Fittings Distributors to safeguard warranties and validate WRAS, BBA, or Kitemark certifications. Look for sellers that have extensive product lines, master distributor status, and robust technical support.

Check product markings and request certification documents when needed. Ensure compatibility with Speedfit PB-1, PEX, or copper before making a purchase. Dependable distributors provide datasheets, compatibility advice, and clear return and warranty policies.

Distributor qualifications to look for

  • A proven John Guest stock record and master distributor credentials
  • Written technical help plus installation guidance
  • Product authenticity guarantees plus reliable push-fit inventory

Online sourcing and Installation Parts Supply

The U.S.-based online shop Installation Parts Supply is known for its John Guest component inventory. Customers who purchase John Guest USA through trusted outlets like Installation Parts Supply benefit from technical sheets, competitive pricing, and verified product availability.

Practical buying tips for plumbers and contractors

  1. Verify markings on the fitting and match them to manufacturer codes.
  2. Ask for WRAS or BBA documentation when certification claims matter.
  3. Confirm pipe compatibility for Speedfit PB-1, PEX, or copper systems.
  4. Ask the distributor about stock levels and return policies before you order.

Choosing established John Guest Fittings Distributors minimizes risks from counterfeit parts. When buying John Guest USA items, prioritize suppliers that offer transparent technical support and proven supply history. That helps provide reliable installation and long-term performance.

Closing Notes

John Guest Fittings have revolutionized plumbing with their advancements over decades. Originating in UK manufacturing in 1961, they’ve established a reputation for quality. Their ISO 9001 certified processes ensure reliability in push-fit fittings and PB-1 piping. These systems feature global approvals like WRAS and BBA, promising longevity in both home and commercial settings.

For tradespeople and DIY enthusiasts, the benefits are practical. Speedfit and PB-1 systems offer quick, tool-free connections. That cuts labor time and minimizes leak risks. They work well in underfloor heating, campervan and RV plumbing, and various industrial applications where durability is key.

When buying fittings, ensure you buy from authorized John Guest Fittings Distributors. Sourcing from trusted outlets like Installation Parts Supply protects warranties and certifications. Always check the distributor’s credentials and product documentation. That helps ensure the John Guess Fittings you install meet the claimed performance and approvals.

1/2 Brass Tee: Pros and Cons for DIY Plumbing Projects

Compression fittings deliver a reliable method to couple copper pipes, avoiding the need for welding or soldering. Both professional plumbers and hands-on homeowners rely on these connectors for quick repairs and installations. The assembly is made up of the fitting body, a compression ring ferrule, and a compression nut. This nut compresses the ferrule, producing a secure seal.

To help achieve a successful installation, use a few important best practices. Start by making square cuts and deburring the tube end. Then inspect the tube end for scratches, distortion, or other damage. Then, hand-tighten the nut before applying a wrench. Use two wrenches so the fitting body is held steady and the pipe does not twist. Remember, do not use overtightening and never reuse a compressed ferrule to support a leak-free joint.

In many jobs, compression fittings are chosen instead of soldered connections. They eliminate the need for a flame and are reusable in many scenarios. One major benefit is that they can be installed more easily in confined or awkward spaces. However, they are bulkier than soldered joints and may not be ideal in high-stress locations or hidden areas that are hard to inspect. It is important to use matching components and follow the manufacturer’s torque or turn specifications for best performance.

  • Compression fittings join copper tubing without solder or flame.
  • Main parts: fitting body, ferrule olive, and compression nut.
  • Prepare tubing with square cuts and deburring for reliable seals.
  • Use two wrenches, tighten carefully, and avoid overtightening to reduce leaks.
  • Select brass or other compatible materials and follow the manufacturer’s instructions.

What Are Compression Fittings And How They Work

Compression fittings connect tubing without solder or heat. They use a simple threaded connection. As it tightens, the connection presses a ring against the pipe and forms a seal. These joints are well suited for tight spaces and field repairs, where a fast connection is essential.

Compressor Tee

Basic Components

The core components consist of the fitting body, the ferrule, and the compression nut. The body provides the seat and thread. The ferrule, also called an olive, is positioned between the compression nut and the pipe. The compression nut threads onto the body to move the ferrule forward.

Compression Sealing Principle

Sealing works by radial compression. As the compression nut tightens, the ferrule moves axially into the tapered bore of the body. This motion makes the ferrule to deform slightly and press against the tubing outer diameter.

The result is a line-contact seal that grips the tube and reduces leaks. The ferrule’s shape and material have a significant effect on seal performance when pressure or temperature changes.

Names And Variations Used Across Trades

Different trades use separate terms for the same idea. In plumbing supply and HVAC catalogs, terms such as compression joint, compression couplings, and compression nut are common. Instrumentation suppliers may list compression joints and compression fittings plumbing next to flare fittings, push-fit connectors, and other mechanical options.

Name Common Use Main Feature
Compression nut Domestic plumbing and gas runs Threaded tightening to compress ferrule
Compression ring Refrigeration, HVAC, and instrument lines Deforms to seal and grip tubing
Mechanical compression joint Field repairs and connections Flame-free assembly with limited reusability
Compression joining couplings Extending or joining tubing runs Two-ended compression seal
Compression fittings plumbing General plumbing installations Broad size and material availability

Copper Tubing Compression Fittings

The choice of material for a compression joint is critical. It affects seal quality, long-term durability, and corrosion risk. Copper fittings are often a good match for copper tubing. They share thermal expansion properties and support consistent metal contact.

Brass compression fittings, on the other hand, provide ductility. That ductility helps the fitting form a reliable seal without unnecessarily damaging the tube.

Stainless steel compression fittings are preferred for high-pressure or high-temperature systems. They also provide resistance to many aggressive fluids. Plastic compression fittings may be suitable for low-pressure household water lines. They avoid metal-to-metal contact and can reduce dissimilar-metal problems.

It is essential to match materials to the application, pressure, and fluid type. For refrigeration and some plumbing, copper or brass parts are recommended. These materials help reduce mixed-metal stress. For applications requiring high mechanical strength, stainless steel is a stronger choice. Just remember, its harder ferrules can deform soft tubing if not sized correctly.

With copper tubing, avoid pairing the line directly with carbon steel or other incompatible metals. Galvanic corrosion can significantly accelerate deterioration at the junction. That can shorten the service life of the connection. If mixed metals are unavoidable, use dielectric unions, insulating sleeves, or choose compatible materials to limit electrical contact.

Before assembling, inspect the tubing’s finish and wall rigidity. Good surface quality allows the ferrule to bite evenly and create a lasting seal. Always use the manufacturer’s compatibility guidance before mixing materials. Following that guidance helps reduce leaks and extend joint life in real-world service.

Types And Sizes Of Compression Tee And T Fittings For Copper Tubing

Choosing the right compression tee is essential, influenced by flow needs, space constraints, and tubing sizes. Compression tees are commonly used in plumbing, refrigeration, and instrumentation systems. Ensuring a proper fit between ferrule geometry and body taper is critical to preventing leaks.

Branching And Tight-Space Variants

Straight tees allow full flow through three aligned ports. Branch tees route flow into a side line with less abrupt direction change. Compact tees are designed for wall cavities and tight areas where standard tees may not fit. They accept common sizes like the Compression Tee 1/2 for residential lines.

Common Size Labels And Cross-Fit Options

Installers commonly choose parts by tube OD or nominal size labels. Popular choices include the 1/4 Compression T Fitting and the 1/2 Compression T Fitting. For small-diameter tube runs, the 1 4 Tee is often used. Larger branches often call for 1/2 Inch Compression Fitting or 1/2 OD Compression Fitting options. Cross-fit options such as 1/2 X3/8 and 3/8 X 1/2 Compression Fitting make it possible to mix sizes when required.

Combination Tees And Adapters

Combination tees like the 1/2 X 1/2 X 3/8 Tee are used for size transitions. A 1/2 X3/8 adapter changes a 1/2 line to a 3/8 branch. The 1 2 To 1 4 Compression Fitting gives a compact reduction for instrumentation taps, sensors, or small branches.

Brass Tee And T Joint Choices

Brass is often selected for copper tubing because it offers corrosion resistance and compatible thermal expansion. For durable connections, look for T Brass Fitting options. The 1/2 Brass Tee and 1/2 Tee Brass are popular for mains and branches. Before mixing brands, confirm thread pitch, ferrule fit, and body taper for a reliable seal.

Fitting Style Common Use Common Size Labels Material Notes
Straight Tee Main run with branch inline 1 4 Tee and Compression Tee 1/2 Brass is commonly preferred with copper tube
Branch Compression Tee Side outlet from main pipe 1/2 Compression T Fitting, 1/4 Compression T Fitting Avoid mismatched ferrules and bodies
Tight-Space Tee Confined locations and wall spaces Compression Tee 1/2 and 1/2 Inch Compression Fitting Compact body with the same compression sealing action
Mixed-Size Tee Changing size for branches or sensors 1/2 X 1/2 X 3/8 Tee, 1/2 X3/8, 3/8 X 1/2 Compression Fitting Step-down adapters are available for small branches
Brass Tee Joint Durable copper-compatible branches T Brass Fitting, 1/2 Brass Tee Matches copper; check pitch and taper

Choosing Compression Fittings Instead Of Soldering Or Other Methods

The best joining method depends on the job conditions, code requirements, and fitting capability. Compression fittings are well suited for tight spaces and areas near flammable materials, as they don’t require flame. Soldering is often better when a permanent, low-profile, visible installation is desired.

Advantages For Quick Installs And Confined Work

No-flame fittings are perfect for emergency repairs and retrofitting, as they remove the need for hot work permits or torches. They only require basic hand tools, making them a go-to for fast fixes. In low-stress systems, limited reuse may be possible, which can help during testing or section replacement.

Bulk, Profile, And Durability Concerns

Compression fittings create bulk compared to soldered seams. Ferrules can make it awkward to remove fittings, limiting their reusability. Over time, vibration or pulsation can cause fittings to loosen, making soldered or brazed connections more suitable for high-stress applications.

Application Selection Guide

For plumbing repairs in tight spaces, compression fittings are useful when a no-flame connection is needed. Where neat appearance and low profile matter, soldering may be the better option.

In some gas-line work, compression fittings may be used for short runs. Always verify local code requirements and use approved materials. Inspect joints regularly so safety is maintained.

In HVAC and refrigeration, choose copper fittings designed for refrigerants. Where thermal cycling is heavy, brazed or flare joints may outlast compression fittings. Compression fittings such as a Compression Tee Fitting or T Compression Fitting can suit service taps, testing points, and temporary connections.

For instrumentation, select fittings that support leak-tight, high-pressure, or high-purity lines. Stainless-steel compression options are effective, but confirm they meet pressure and media ratings before installation.

Factor Compression Fitting Solder Or Braze
Installation Tools Simple hand tools Torch, flux, solder or filler
Repair Speed Quick for many repairs Slower due to heating and cooling
Joint Size Bulkier fitting body Low profile, neat runs
Serviceability Possible but limited; reuse compression fittings varies Cut-out repair usually required
Dynamic Stress Performance Moderate, with loosening possible High resistance with rigid bonded joints
Typical Applications Plumbing repairs, gas lines, HVAC service tees Permanent plumbing runs, aesthetic installations

Choose the joint style according to pressure, temperature, service access, and material compatibility. Compression Tee Fittings and T Compression Fittings can be useful in plumbing, gas-line work, HVAC fittings, and instrumentation when a serviceable or flame-free connection is needed.

Installation Best Practices For Reliable Compression Joints

A reliable installation starts with careful preparation and a clear assembly sequence. Each step is critical to prevent leaks and damage. This section explains how to install compression fittings on copper tubing and when to source compatible parts or tools from Installation Parts Supply.

Proper preparation of copper tubing is essential. Cut the tube squarely with a tubing cutter, then remove burrs with a reamer or deburring tool. Inspect the tube end for any nicks or deformations. Clean the tube and check the fitting and ferrule for damage before starting the assembly.

Begin by sliding the nut onto the pipe, ensuring the threads face the end. Then place the ferrule or olive onto the pipe. Insert the pipe fully into the fitting body, ensuring the ferrule seats correctly. Hand-tighten the nut first, align the assembly, and then use a wrench for final tightening.

Correct tightening is key to a secure seal. Hold the fitting body with one wrench while tightening the nut with another. Follow the manufacturer’s instructions for rotation-based turns, not just torque readings. Do not over-tighten, because too much force can flatten the ferrule and cause leaks.

Replacement ferrules are often needed after disassembly. Once an olive or ferrule has been compressed, it should not be reused. If a ferrule is stuck, use a ferrule puller or carefully cut and remove it to avoid damaging the fitting body.

Plastic tubing usually needs an insert to maintain shape under compression. Copper tubing generally does not require inserts. After reassembly, slowly open the supply and check for leaks. If necessary, tighten incrementally. For compatible parts, sizing details, and specifications, consult Installation Parts Supply.

Design And Ferrule Details That Affect Performance

The choice of ferrule directly influences a compression joint’s performance under pressure and over time. Both one-piece and two-piece ferrules have benefits, limitations, and installation considerations. Ferrule design must match the tubing material, tube size, and fitting body geometry to create a secure, lasting seal.

Common ferrule shapes and material choices

Ferrules are most often made from brass or stainless steel. For chemical resistance, high temperature, or specialty service, graphite or specialty alloy ferrules may be used. A single-piece ferrule is easier to install and works well with softer copper tubing. On the other hand, a two-piece ferrule includes a rear ferrule, preventing rotation and galling, which is essential for stainless systems.

Asymmetrical versus symmetrical ferrules

An asymmetrical ferrule is installed in a specific orientation, supporting consistent performance. It is often preferred for high-reliability applications. A symmetrical ferrule can usually be installed either way, making assembly faster. However, it may perform less reliably on hard plastics where OD tolerance variations can contribute to leaks.

Line contact and surface contact seal geometry

The design of the ferrule determines whether it uses a line contact or surface contact seal. Line-contact seals often resist creep and vibration better. Over-tightening can, though, convert a line contact seal into a surface contact, increasing the risk of leakage over time.

Tubing factors and material behavior

Metal tubing must have smooth walls and precise cuts to ensure proper ferrule seating. Copper tubing from coils can have slight shape irregularities that influence sealing. Soft plastics and PTFE can creep or cold-flow under compression, which may reduce seal integrity over time.

Soft tubing and PTFE cold-flow mitigations

To counteract PTFE cold flow, consider using tubing inserts or redundant internal O-rings. Hardened ferrules may help distribute load more effectively. In high-pressure or high-purity systems, choose materials and approved lubricants that limit galling and residue. Make sure ferrule material matches the tubing, pressure, media, and service requirements for long-term seal reliability.

Common Installation Mistakes And Troubleshooting Techniques

When diagnosing compression fitting problems, begin by checking nut tightness, tube alignment, and ferrule condition. Small leaks often stem from an under-tightened nut or an improperly seated ferrule. To avoid damaging the tubing, stabilize the fitting body with one wrench while tightening the nut with another.

Problems from overtightening can create pipe deformation, crushed ferrules, and persistent leaks. Over-tightening can damage the copper tubing or flatten the ferrule, leading to a poor seal. If you notice flattened tubing or a gouged ferrule, it is best to cut back the tubing and replace it with a new ferrule and nut.

Under-tightening can leave a small gap that allows slow seepage. For minor weeps, apply small, incremental turns with a wrench until the leak stops. Use gradual tightening to avoid over-compressing the ferrule while still achieving a reliable seal.

Misalignment and twisting stop proper ferrule compression. Ensure the tubing enters the fitting straight and fully. If the ferrule is misaligned, it can jam or become difficult to remove. To remove a stuck ferrule, use a ferrule puller or cut it off and replace it, being careful not to damage the tubing.

Identifying and fixing leaks involves inspecting the ferrule seating and part condition. Replace any damaged ferrule, nut, or fitting body. For a quick fix, incremental tightening can stop small leaks until a proper repair can be scheduled. If leakage continues, re-cut the tube end, replace damaged parts, and reassemble the fitting.

Dealing with corrosion and galling calls for corrective repair and preventive material selection. Corrosion can pit sealing faces and cause repeat leaks. Galling can lock nuts and bodies, making them difficult to remove. Apply penetrating oil to stuck nuts and allow time for soaking. If threads, tapers, or sealing faces are damaged, replace the affected parts.

Correct material selection helps prevent corrosion, galling, and premature failure. Avoid pairing carbon steel with copper to prevent galvanic reactions. Select ferrules and fittings suitable for your system’s chemistry and temperature. In cleanroom or high-purity environments, volatile cleaning agents can increase galling risk; use ferrules designed to resist galling and compatible lubricants when allowed.

Stuck nut recovery often begins with penetrating oil and patience. If the nut will not move, cutting off and replacing the nut and ferrule may be quicker than forcing it. Use the correct tools so the fitting body is not damaged.

When a compression joint is not the right choice, other joining methods should be considered. Systems exposed to constant vibration, long-term dynamic stress, or strict low-profile needs may benefit from soldering, mechanical crimp systems, flare fittings, or welded joints. Compare soldering vs compression for permanence, profile, and code requirements when planning a repair or new installation.

Problem Likely Cause Immediate Fix Permanent Solution
Small weep Loose nut or poorly seated ferrule Apply small turns while holding the body steady Install new ferrule and nut and re-cut tube end
Ongoing leak despite tightening Crushed ferrule or distorted tubing Cut back tubing, fit new ferrule and nut Follow turn-count guidance and avoid excess force
Ferrule or nut will not release Galling or ferrule swaging Use penetrating oil, ferrule puller, or careful cutting Install new parts and select anti-galling materials
Corrosion or pitted seal Wrong material choice or chemical attack Replace corroded parts Use compatible metals and follow applicable codes
Leak under vibration Dynamic stress exceeds fitting suitability Support lines and reduce movement Use soldering, welded joints, or crimp systems as alternative to compression fittings

Final Thoughts

Copper Tubing Compression Fittings conclusion: compression fittings deliver a flexible, flame-free solution for copper tubing in various fields. They work well when materials are matched and installation techniques are followed correctly. Brass, copper, stainless steel, and some plastics can be compatible when galvanic corrosion and thermal mismatch are avoided.

Installation Parts Supply guidance emphasizes replacing ferrules during reassembly and tightening fittings according to manufacturer specifications. This ensures reliable sealing.

Choose compression fittings for fast repairs, confined spaces, and removable joints. They do have limits when compared with soldered joints. Long-term performance depends on ferrule design, tube quality, material compatibility, and correct assembly order.

For high-pressure or high-vibration systems, use ferrules rated for these conditions. When compression fittings are not suitable, consider soldering, brazing, crimping, flaring, or welding.

This summary highlights the importance of routine checks and careful installation. Make sure cuts are square, clean, and deburred. Use a sliding nut, ferrule, and insert, and tighten by hand followed by measured wrench turns.

Follow manufacturer guidelines for torque or turn-based tightening to prevent leaks or damage. For parts and compatible ferrules, consult suppliers. They should offer 1/4 Compression T Fitting, 1/2 Compression T Fitting, and brass tee options to match your project.

Shurflo RV Pump for Class A Motorhomes: A Setup Guide

Understanding the role of a Shurflo 12 Volt Pump is key for RV and marine water systems. Whether you are in a travel trailer, campervan, or powerboat, the right Shurflo RV Pumps are critical. Pump choice directly influences pressure delivery, operating noise, and long-term dependability.


Shurflo makes multiple pump models, and each one is configured for a different water-demand situation. The Aqua King II 4128 and 4138 provide 2.0–3.0 GPM, with a co-molded diaphragm and internal bypass for smooth operation. The 105 is ideal for tight spaces because it is compact and energy-efficient. The Revolution series combines smooth performance with specifications often used in OEM RV setups.

This guide will compare the Shurflo 2088 Pump legacy with newer models. It will also cover installation, operation, maintenance, and selection tips for U.S. RVers and boat owners.

Important Points

Shurflo 12 Volt Pump

Why A Shurflo 12 Volt Pump Works Well For RVs And Boats

Choosing the right pump can noticeably change daily life for people on the move. Shurflo 12 Volt Pumps are designed to deliver steady pressure and dependable longevity. Because they are compact and use modest power, they work well in 12V systems found in RVs, trailers, and small boats.

Proven Performance And Brand Trust

Shurflo RV Pumps are widely known for reliable service in both RV and marine systems. The Aqua King II series, for example, includes a sealed motor and switch to protect against moisture. Electro-coating adds corrosion resistance, which is especially useful around saltwater and damp marine spaces. These features strengthen Shurflo’s reputation among boaters and RV enthusiasts who want durable gear.

Key Benefits For RV And Marine Systems

A number of Shurflo models include a one-piece diaphragm and internal bypass to smooth flow. The Revolution-series pumps are popular because they combine reasonable cost with reliable performance and common OEM compatibility. For limited spaces such as campervans, the Shurflo 105 low-flow design can be an excellent fit.

These pumps also include thermal overload protection and dry-run capability for safer intermittent use. Their quiet operation and consistent pressure make them useful for showers, sinks, and kitchens in RVs and boats.

Pump sizing is simpler because Shurflo offers everything from compact low-flow models to larger multi-fixture options. That variety allows owners to compare flow, power use, noise, and price. Buyers also benefit from Shurflo’s established reputation for dependable water-system products.

Shurflo 12 Volt Pump Models, Specifications, And Best Applications

When selecting a Shurflo 12 Volt Pump, examine the models and specifications carefully. Small vehicles and boats need compact pumps with modest flow rates. Bigger RVs and marine systems often do better with mid-range units or the Shurflo Revolution series. Those models can deliver smoother delivery while keeping operating noise lower.

Low-flow Shurflo options include compact pumps made for tight mounting spaces and steady basic water delivery. They are ideal for small trailers where installation space and battery draw are major concerns.

Mid-range models are designed for multi-fixture layouts. They balance flow and pressure for showers, multiple faucets, and simple onboard systems. The Shurflo 2088 Pump appears here as a legacy reference for comparing service parts and long-term reliability.

Shurflo Revolution models provide a modern design with a one-piece diaphragm, internal bypass, and quieter operation. Because they support higher shutoff pressure and better flow, these units are a popular upgrade for RV owners wanting improved performance.

The table below compares representative models and key pump specifications to help you choose the best fit.

Model Typical Flow Cutoff PSI Self-Prime Best Use
Shurflo 105 Approximately 1.0 GPM 30 PSI About 2.5 ft Compact builds and small campervans
4128 Aqua King II Approximately 2.0 GPM Variable shutoff Up to 6 ft Boats and medium-demand cabins
Aqua King II 4138 About 3.0 GPM Adjustable Up to 6 ft Multiple fixtures, larger systems
Shurflo 4008 Revolution Approximately 2.3–3.0 GPM About 55 PSI Self-priming RV upgrades, OEM replacements
Triplex family (legacy) Depends on model Depends on model Varies Compare for parts to Shurflo 2088 Pump

Performance trade-offs are critical. Higher PSI delivers stronger streams at a faucet, but heavy backpressure can lower flow under low voltage. Voltage sensitivity of about ±10% affects output, so wiring and battery condition shape results.

Match pump capacity to fixture count and plumbing layout. For example, a 4138 can support up to three fixtures comfortably. The 4128 is generally better for two fixtures or simpler plumbing layouts. Consider plumbing run length and fittings when reading pump specs.

Serviceability and parts availability affect long-term ownership. Even though many owners now choose Revolution or Aqua King models, the Shurflo 2088 Pump remains a useful reference for repairs, parts matching, and older-system comparisons.

How To Install A Shurflo Pump For Quiet And Reliable Operation

Start by choosing a pump location with both mounting stability and future service access in mind. Installing the pump within six feet of the tank helps with priming and may improve long-term reliability. Allow at least one cubic foot of space for ventilation and access. Choose a solid mounting surface to reduce vibration and noise.

The pump can be installed in any orientation. However, it should be positioned so strainers, fittings, wiring, and service points are easy to access.

Use flexible high-pressure hose on both inlet and outlet to reduce noise and stress. Use a minimum 1/2″ ID (13 mm) hose, and avoid connecting rigid pipe directly to the pump ports. Anchor the flexible hose where it meets hard plumbing and leave about 18 inches of hose where practical to isolate vibration.

Install a 50-mesh inlet strainer, including suitable 50- or 255-series options, to keep debris out of the pump.

Minimize elbows, restrictive valves, and reduced-diameter runs to prevent cavitation, high backpressure, low flow, and noise. By-pass style pumps rarely need an accumulator, but add one if you want to reduce cycling. In many setups, quick-connect hose kits provide neat, serviceable connections and help keep the plumbing quieter.

Connect the pump to a dedicated circuit that matches the fuse rating specified for the model. Many 12V Shurflo pumps need a minimum 10 amp circuit. Follow the motor-label fuse value, and for boats use an ignition-protected marine switch rated at 15A or higher. To limit voltage drop on a 12V/10A circuit, follow common wire sizing guidance: 0–25 ft = 16 AWG, 25–50 ft = 14 AWG, 50–70 ft = 12 AWG, and 70–110 ft = 10 AWG. Always shut off pump power when leaving an RV or boat unattended.

Keep positive wiring short and routed away from heat or chafe points. Use battery terminals, crimped ring terminals, and heat-shrink butt connectors for reliable joins. Install a fuse close to the battery positive terminal and place the switch on the positive circuit to follow marine ignition-protection best practices.

Below is a quick reference of common parts and mounting tips to help plan a smooth Shurflo 12 Volt Pump installation. The list highlights compatible components and explains why they matter for quiet, reliable performance.

Item Function Suggested Use
Compatible inlet strainer Protects pump from debris Fit on the inlet and match it to 1/2″ ID hose
1/2″ ID flexible high-pressure hose Helps isolate pump movement Use about an 18 in. flexible section where practical and anchor near fittings
Quick-connect fittings and hose kits Creates clean removable junctions Choose marine-grade fittings and match hose ID
Accumulator Helps control pulsing and hammer Optional for by-pass pumps; consider if short cycling occurs
OEM repair kits Supports long-term pump service Keep kits for 4128/4138, Revolution/4008, and similar models
Correct fuse and switch Prevents overload damage Fuse per motor label; use ignition-protected 15A+ switch for boats
Proper wire gauge Prevents voltage drop and heat Use 16–10 AWG according to run length for 12V/10A circuits

For authentic replacement parts, use suppliers that carry model-specific service kits, strainers, and pump accessories. Installation Parts Supply carries compatible items such as 255-series strainers, quick-connect hose kits, and service kits for common models. Using genuine or compatible quality components supports longer performance and safer Shurflo RV Pumps wiring, servicing, and repair.

When changing diaphragms, seals, or valves, always match the parts to the exact pump family. The Shurflo 2088 Pump parts remain common in many older rigs, so confirm part numbers before ordering. Apply correct fitting torque, leak-test the system, and listen for cavitation, rattling, or rapid cycling during the first startup.

Operation, Maintenance, And Troubleshooting Tips For Long Pump Life

Shurflo pumps are designed for intermittent use. They are well suited to sinks and showers but not continuous-running systems. Always turn off power when leaving the RV or boat to prevent battery drain.

For daily use, focus on short runs and proper plumbing. Do not use undersized tubing, sharp restrictions, or fittings that choke flow. A clean plumbing layout helps the pump work smoothly and reduces mechanical wear.

Everyday Operation And Pump Limits

Operate the pump within its duty rating. The Shurflo 2088 Pump, for example, should not run continuously unless it is rated for duty-cycle use. Check voltage at the pump regularly to confirm it stays within 10% of rated voltage.

Pay attention to rapid on-off cycling while fixtures are being used. Fast cycling may point to plumbing restrictions or a low shut-off setting. Fixing those causes can help prevent premature diaphragm, valve, or switch failure.

Regular Maintenance Jobs

Clean the inlet strainer regularly to prevent sputtering or loss of prime. Check hose clamps, mounting feet, terminals, and wiring for looseness, corrosion, and wear.

Periodically sanitize potable water systems with the bleach method recommended for RV and marine water tanks. A common approach is 2 ounces of bleach per 15 gallons of water, followed by flushing after the required contact time. Follow manufacturer instructions for winterizing and sanitizing before use.

Use OEM service kits for worn parts. Replace diaphragms, check valves, and seats as needed. A proper service kit can restore pump performance and extend service life.

Basic Troubleshooting Checks

If the pump does not start, or if the fuse blows, begin with the main switch, wiring, and electrical connections. Also inspect the thermal breaker and measure voltage at the pump while it is running.

If the pump will not prime, sputters, or pulls air, inspect the inlet strainer and tank water level first. Look for air trapped in the water heater, vacuum leaks, kinks, and debris in valves.

For a pump that will not shut off, check for output-side leaks and trapped air. The same symptom may come from a faulty pressure switch or a bypass setting that is too high. Rough or noisy operation can suggest restricted flow, vibration transfer, loose plumbing, or cavitation.

  • Keep power off when unattended to reduce cycling and battery drain.
  • Maintain a clean strainer and use recommended hoses to avoid restriction.
  • Replace worn parts with OEM kits for reliable Shurflo 2088 Pump service and similar models.
  • For Shurflo RV Pumps troubleshooting, check electrical supply, inlet flow, outlet leaks, and mounting condition.

How To Select The Best Shurflo 12 Volt Pump For Your Setup

The best pump choice starts with matching flow, pressure, and size to your real water-use needs. A thoughtful plan streamlines selection and reduces installation surprises. Before buying, consider the number of fixtures, the mounting space, noise expectations, power draw, and long-term service needs.

Evaluating Your Water Demand

Begin by counting sinks, showers, and outlets, then estimate how many may run at once. For a single sink or compact campervan, the Shurflo 105 with roughly 1.0 GPM may be enough. Mid-size RVs often benefit from the Revolution series, which delivers 2.3–3.0 GPM at 55 PSI. For systems with multiple outlets, the 4128 at 2.0 GPM or the 4138 at 3.0 GPM can support reliable flow for roughly two to three fixtures.

Installation Space And Noise Priorities

Measure the planned pump space and check the port type. Tight compartments may require a compact pump or quick-connect model. If noise reduction is a priority, consider the Revolution series or Aqua King II. These models use a one-piece diaphragm and internal bypass to reduce cycling noise and smooth flow in small installations.

Important Durability Features To Look For

Choose pumps that offer dry-run capability, thermal overload protection, and sealed motor-and-switch assemblies. Electro-coating or corrosion-resistant finishes matter for marine applications. Model-specific service kits for 4128, 4138, Revolution, and 4008 families can extend service life and simplify repairs.

Buying Tips And Warranty Considerations

When buying Shurflo RV Pumps, use trusted sellers and genuine or compatible quality parts. Installation Parts Supply offers OEM pumps, service kits, and accessories that meet factory specifications. Check the warranty details and operate the pump within its intermittent-duty rating to help maintain coverage. Use Shurflo-compatible strainers, hose kits, and replacement parts to support dependable operation.

Quick Comparison Aid

Model Approximate GPM Recommended for Main feature
Shurflo 105 Approximately 1.0 Small campervans and compact builds Space-saving low-flow design
4128 Approximately 2.0 Two-fixture systems and small RVs Moderate output and repair-part availability
4138 About 3.0 Three-fixture layouts and mid-size RVs Stronger flow and durable output
Shurflo Revolution Approximately 2.3–3.0 Quiet upgrades for mid-size rigs Quiet operation, internal bypass

For targeted choices, compare specifications and features side by side before purchase. A brief Shurflo 2088 Pump comparison can help if you need a different flow profile or vintage replacement. Use the comparison results to choose the correct pump and order parts through trusted suppliers like Installation Parts Supply.

Final Thoughts

The Shurflo 12 Volt Pump family supports a wide range of installations, from compact campervans to larger marine systems. Options like the low-flow 105, the Revolution/4008, and the Aqua King II 4128/4138 provide a useful spread of flow and pressure levels. These pumps include features such as one-piece co-molded diaphragms, internal bypass, dry-run protection, sealed motors and switches, and thermal overload protection. Together, those features help promote long-lasting pump performance.

To get reliable water pressure, match the pump’s GPM and PSI to your fixture count and expected usage. For best results, mount the pump within six feet of the tank and use 1/2″ ID flexible high-pressure hose. A 50-mesh strainer is a smart protective addition. Protect the circuit with a dedicated fused line and use an accumulator only when needed.

Maintaining the pump is essential for longevity. Clean strainers, sanitize systems periodically, and winterize to prevent freeze damage. Replace service kit components when performance declines. The Shurflo 2088 Pump and other Shurflo RV Pumps benefit from regular maintenance that improves reliability and extends service life.

For genuine parts, compatible accessories, and service kits, choose Installation Parts Supply. This helps ensure correct fit and OEM-quality components. Follow best installation practices, maintain the system, and select the correct Shurflo 12 Volt Pump. The result is steadier pressure, fewer service problems, and more dependable RV or marine water use across the United States.

Flojet Parts Replacement: OEM vs Aftermarket Compared

The Flojet Bw5000 is a small-footprint system engineered for dispensing recipe-grade water. It feeds coffee machines, ice makers, portable sinks, and hand-wash stations. Often listed as BW5000-A or BW5000-010A, it delivers water from commercial bottles to provide a reliable flow for mobile catering, coffee carts, and foodservice setups.

BW5000 Flojet units are offered in single-wand and twin-wand setups, supporting one- or two-bottle configurations. Power options cover 115 VAC as standard, with 230 VAC and 12 V DC for mobile use. Controls are simple, featuring an illuminated on/off switch and automatic shut-off/restart when a bottle is replaced.

Made by Flojet, a Xylem brand, the BW5000 has earned a strong position in the bottled-water pump market. It is an cost-effective, industry-standard pump used by bottled water companies, coffee carts, and service providers. Warranties often extend up to four years, and genuine Flojet Pump Parts and Flojet Parts, like the KR part FP5000010, are available from suppliers like Installation Parts Supply.

  • Flojet Bw5000 supplies potable water from standard bottles to appliances and mobile stations.
  • It is offered in single-wand and twin-wand configurations for flexible installation layouts.
  • Power options include 115 VAC, 230 VAC, and 12 V DC for on-the-go use.
  • Known for affordability and wide adoption across catering and coffee service markets.
  • Genuine Flojet Pump Parts, repair support, and Flojet Pump Repair resources are supported through sources such as Installation Parts Supply.

Overview Of The Flojet BW5000 Bottled Water Dispensing System

The Flojet BW5000 is a compact bottled-water system that supplies high-quality water from standard bottles to a range of equipment. It is perfect for espresso machines, coffee brewers, tea urns, and more. Its auto-shutoff and auto-restart features make it ideal for busy or remote locations.

BW5000 Basics And Common Applications

This Flojet Bottled Water Dispenser uses diaphragm pump technology to provide controlled water flow. It is designed to fit behind counters, under counters, or inside cabinets, making it useful where plumbed water is unavailable. Mobile coffee carts and temporary event stations greatly benefit from its simple setup.

Its automatic features significantly reduce the need for constant monitoring. It pauses when a bottle is empty and resumes with a new one. That makes the Bw5000 Flojet a dependable option for users who need consistent water delivery without complex plumbing work.

Flojet Bw5000

Flojet BW5000 Model Options And Warranty

Flojet offers the BW5000 in one-bottle and two-bottle configurations. Common model references include BW5000-A and BW5000-010A. Standard units run at 115 VAC, but some models are available for 230 VAC or 12 V DC for international or mobile use.

These pumps are manufactured by Xylem under the Flojet brand. Many listings show a four-year warranty on genuine units. That warranty generally covers defects in materials and workmanship under normal use. It is important to confirm warranty details with the seller at purchase.

Flojet BW5000 Key Benefits At A Glance

  • Illuminated on/off switch for easy use in low light.
  • The diaphragm pump design allows brief run-dry capability and gentle water handling.
  • Rubber feet dampen vibration and help keep operation quiet.
  • Thermal overload protection guards the motor from overheating.
  • Quick-disconnect ports make wand and tubing replacement faster.
  • A small footprint and portable design fit tight installations.

Replacement Flojet Pump Parts are commonly carried for maintenance and quick repairs. This minimizes downtime and supports longer service life in high-use environments.

Real-World Capability And Performance Specifications For The Flojet Bw5000

The Flojet Bw5000 is designed mainly for single-appliance supply, balancing compact size with efficient operation. It is well suited for those needing a reliable, compact solution for bottled water. The details below cover key specifications and planning notes for installation or Flojet Pump Parts selection. These points can help your decision about whether the Bw5000 Flojet fits your setup.

Flow, pressure, and electrical specs

The Bw5000 has a maximum flow rate near 1.09 gallons per minute, or 3.8 L/min, with typical operation often around 2.3 L/min. It can produce a maximum pressure of 40 psi 2.76 bar. Most units run at 115 VAC, but there are also options for 230 VAC and 12 V DC.

Power consumption differs by type: 12 V DC models use up to 3.0 A, while 115 VAC models use about 0.5 A. The 230 VAC versions consume roughly 0.25 A. AC models run at 50/60 Hz. It features automatic shut-off when a bottle is empty and restarts when a new one is installed.

Physical size and weight for installation planning

Allow for approximate dimensions of 2.7 inches high, 5.4 inches wide, and 8.5 inches deep so hoses and clearance can be planned properly. The pump weighs roughly 4.5 to 5.0 pounds, or about 2.04 kg, which makes it simple to mount in cabinets or on carts.

When ordering Flojet Pump Parts or replacements, use the GTIN 705474208005 and KR Part # FP5000010 references provided by the manufacturer.

Real-world performance considerations

The pump is mainly suited for one appliance at a time. A food-grade Y or T connector may be used for light, staggered split-line applications. If two lines run at the same time, flow is usually divided, dropping to roughly 1.15 L/min per line from a 2.3 L/min baseline.

Avoid running two high-demand devices at the same time, such as an espresso machine and dishwasher. The Bw5000 Flojet is compact and compact, ideal for tight mobile setups and enclosed cabinetry. An illuminated switch supports operation in dim environments and simplifies Flojet Pump Repair checks during service calls.

Spec Rating Practical Notes
Peak Flow Up to 1.09 gpm or 3.8 L/min Typical operating flow is often reported around 2.3 L/min
Max Pressure 40 psi / 2.76 bar Works best with single-appliance demand
Voltage Options 115 VAC / 230 VAC / 12 V DC AC versions are 50/60 Hz; match the unit to site power
Electrical Draw Approx. 3.0 A at 12 V, 0.5 A at 115 VAC, 0.25 A at 230 VAC Modest draw helps with mobile and standard installations
Dimensions conservative Approx. 2.7″ high x 5.4″ wide x 8.5″ deep Allow room for hoses, bends, and cabinet mounting
Pump Weight Approx. 4.5 to 5.0 pounds Light enough for carts and mobile setups
Controls / Safety Auto stop and restart features Helps prevent dry running and supports repair diagnostics
Ideal Use One-appliance supply Avoid simultaneous high-demand loads
Ordering References 705474208005 and FP5000010 references Useful when ordering Flojet Pump Parts

Key Features And Benefits Of The Flojet BW5000

The Flojet Bw5000 pairs practical design with top-notch reliability for bottled water service in various settings. Its compact size and intuitive controls help make it easy to place and use. This section highlights the key features that benefit both operators and technicians.

User-friendly controls and ergonomics

The illuminated On/Off switch stays visible even in low-light conditions. Some models include a T-shaped wand handle that makes bottle changes easier. Its small size and versatile mounting options work well in tight spaces and mobile setups.

Protection features and long-term durability

The diaphragm pump design can handle occasional dry runs, reducing damage risks. Thermal overload protection in the control box helps protect the motor from overheating. Rubber feet soften noise and vibrations, ensuring quiet operation in small spaces.

Service-friendly installation features

Quick-disconnect ports make possible fast wand or tubing replacements without tools. Standard 115 VAC configurations make installation simple in many locations. Automatic shutoff and restart during bottle changes help minimize downtime.

Genuine Flojet Parts are widely available for maintenance and help support continuous operation. These parts are made to Xylem/Flojet standards, giving service teams greater confidence in fit and quality. Using the right parts supports the Flojet Bottled Water Dispenser’s performance, reliability, and service life.

Flojet Pump Maintenance, Common Parts, And Repair Guidance

Routine maintenance extends Flojet Bw5000 service life and reduces unexpected repair needs. Basic checks of tubing, fittings, wand assembly, and the illuminated switch can catch wear early. These checks help prevent flow problems and performance issues. Regular inspections and timely replacements help maintain safe operation and reliable flow.

Routine maintenance tasks for longer service life

Check tubing and quick-disconnect fittings for cracks, stiffness, hardening, kinks, or blockages. Replace tubing when stiffness or discoloration appears to maintain water quality and flow.

Examine the wand assembly and inline filters often. Clean or replace filters to reduce biofilm, mineral buildup, or restriction in long-term installations. Test automatic shutoff and restart during bottle changes to confirm the sensors and valves are operating correctly.

Check the illuminated switch and power cord for wear. For 12 V setups, check terminals for corrosion or looseness. Confirm plugs, terminals, and connectors fit tightly to avoid intermittent operation.

Common Flojet Pump Parts and sourcing options

Parts that see the most service consist of wand assemblies, replacement tubing 1/4 inch standard, quick-disconnect couplings, rubber feet, diaphragms, and motor components. Use part references like BW5000-010A and KR Part # FP5000010 to verify compatibility.

Flojet Parts and genuine Xylem components preserve warranty coverage and performance. Purchase from authorized manufacturer channels or reputable plumbing suppliers to confirm authenticity and proper fit.

Component Typical Failure Mode Reference / Part Number Recommended Source
Wand assembly Clogs, cracked tip, or worn end BW5000 replacement wand kit Flojet-authorized dealers
Standard 1/4″ tubing Hardening, kinks, discoloration Standard 1/4″ tubing, 20 ft. kits Foodservice plumbing suppliers
Quick-disconnect fitting Loose connection or seal failure Compatible quick-disconnect fittings Specialty suppliers
Diaphragm / motor parts Wear, loss of pressure BW5000-010A or KR Part FP5000010 Flojet / Xylem authorized parts
Rubber feet Worn or missing vibration feet Compatible rubber vibration feet Hardware suppliers or OEM sources

Basic troubleshooting and Flojet Pump Repair tips

No flow often traces to power, a blocked wand, or improper tubing seating. Confirm the 115 VAC or 12 V supply, test the illuminated switch, and check the tubing and wand for debris, kinks, or blockages.

Low flow may indicate a clogged inline filter or an air leak at the quick-disconnect fittings. Tighten connections, replace suspect tubing, and ensure the pump matches the appliance demand when outputs are split.

If the motor overheats and shuts off, let it cool before restarting. Thermal protection may have tripped. Verify ventilation and duty cycle. Avoid continuous dry running, even though the diaphragm can tolerate brief dry-run events.

Address noise and vibration by checking rubber feet and mounting. Replace worn feet and secure the unit to damp vibration transfer to counters or cabinets.

For component-level Flojet Pump Repair, use genuine replacement parts and review Flojet or Xylem service guidance before opening motor or diaphragm assemblies. Authentic parts help retain warranty and long-term reliability.

Where To Buy The Flojet BW5000: Price And Compatibility Guide

When shopping for a Flojet Bw5000, begin with realistic expectations about price, accessories, and fit. The BW5000 unit is often priced around $169.95. Pricing can vary depending on the seller, single-wand or twin-wand configuration, and included accessories.

The Bw5000 Flojet stands out due to its durable diaphragm design, quiet operation, and thermal protection. It offers great value for mobile foodservice and beverage setups.

For genuine Flojet Parts, look to authorized Xylem or Flojet dealers, specialty pump distributors, and reputable plumbing parts shops. Online suppliers also carry Flojet Pump Parts and complete Flojet Bottled Water Dispenser units. Always confirm warranty terms and check if the seller is an authorized reseller to ensure a four-year coverage.

Before purchase, review return policies, shipping windows, warranty terms, and seller ratings. Delivery from major distributors often takes around two to four days. Keep receipts, order details, and packaging available for warranty claims or parts exchanges.

Ensure the pump supports your appliance’s demand for reliable service. The peak flow is about 1.09 gpm, with typical operational flow near 1 gpm. That flow rate works for one appliance or light, non-simultaneous split use with a food-grade Y or T connector. Avoid sharing the outlet for simultaneous high-demand gear like dual espresso machines or a dishwasher plus coffee brewer.

Use food-grade tubing and factory-approved connectors to protect taste and hygiene. Verify the mounting space fits the unit’s approximate dimensions. Also confirm that the power supply matches 115 VAC where that version is used. When replacing worn components, source genuine Flojet Parts to maintain performance and warranty coverage.

Conclusion

The Flojet Bw5000 is valued as a compact, dependable bottled water dispenser. It works well for mobile catering, coffee carts, compact beverage stations, and small foodservice setups. Its durable diaphragm pump and thermal protection help provide quiet and consistent service. That makes it practical for low-to-moderate flow requirements.

For users supplying one appliance, the BW5000 Flojet offers dependable performance. It is compact and easy to use, without unnecessary complexity.

When purchasing, expect to pay around $169.95 for standard single-wand units. Confirm the exact model and power option, including references such as BW5000-010A, BW5000-A, 115 VAC, 230 VAC, or 12 V. Buy from authorized dealers or reputable online suppliers to receive genuine Flojet Parts and valid warranty coverage. Keeping common Flojet Parts on hand can limit downtime and make repairs easier.

In summary, the Flojet Bw5000 is a cost-effective choice for users who value quiet operation, portability, and dependable dispensing. For higher-demand applications, consider a higher-flow system or an additional pump. Regular maintenance and the repair guidance in Section 5 can help extend service life and maintain reliable performance.

When to Call a Professional for Flojet Pump Repair

The Flojet Bottled Water Dispenser offers a simple, clean way to hydrate homes and offices without the need for complex plumbing. Models like the flojet bw5000 and other bw5000 flojet variations provide automatic dispensing for 3- to 5-gallon bottles. These units serve as both bottled water coolers and electric water pumps, reducing the need for manual lifting and speeding up service in break rooms and kitchens.

Find out more about Flojet Pump Parts
Built for office managers, facilities teams, catering staff, and homeowners, this bottled water cooler is valued for its ease of installation and compatibility with standard bottles. Consumer pumps operate on 110–120V AC, consuming about 30–60 W. They come equipped with self-priming motors and automatic pressure switches for reliable, effortless performance.

On the market, similar electric bottled water pump systems are priced around $100–$120 for consumer-grade units. Higher prices apply to dual-outlet or high-flow models. The main benefits include reduced manual handling of heavy bottles, faster access to chilled or ambient water, and enhanced workplace hydration through a compact home water dispenser or a robust office water dispenser setup.

Key Takeaways

  • Flojet Bottled Water Dispenser models, including flojet bw5000, enable quick, plumbing-free hydration.
  • These units fit standard 3–5 gallon bottles and function as a bottled water cooler or automatic water dispenser.
  • Typical consumer pumps run on 110–120V and 30–60 W with features like self-priming and pressure switches.
  • Comparable electric bottled water pump systems are often priced around $100–$120.
  • Ideal for homeowners, office managers, and hospitality staff seeking easy installation and reduced bottle handling.

Overview Of Flojet Bottled Water Dispenser Technology And Benefits

Flojet bottled water dispensers efficiently transfer water from 3- to 5-gallon bottles to coolers or taps. They utilize a compact electric drive. The systems employ a sealed diaphragm or piston-driven pump, ensuring self-priming without manual intervention after bottle changes. This design, along with sealed motors and encapsulated windings, shields internal components from moisture, extending their lifespan.

What A Flojet System Is And How It Works

A Flojet system connects to the bottle via tubing or a neck adapter, drawing water through a check valve to maintain pressure. Many models feature an automatic dispenser control that starts on demand and stops when pressure or tank level reaches a set point. Additional features include dry-run protection and thermal overload safeguards, safeguarding the motor under heavy use.

Flojet Bottled Water Dispenser

Key Benefits For Home And Office Use

The Flojet Bottled Water Dispenser eliminates the need for heavy lifting and reduces spills, making it perfect for offices and homes. Its bottom-access and plumbed setups keep countertops clear and simplify refills. In busy break rooms and kitchens, it speeds up beverage preparation for coffee and tea, minimizing handling time.

Hygiene is enhanced due to sealed tubing and automatic systems, which minimize contact with bottle necks and spigots. Portable models are ideal for leased spaces and events, while multi-outlet or high-pressure variants handle heavy traffic without additional labor.

Typical Components And Materials Used (Stainless Steel, High-Grade Plastics, Seals)

Wetted pump faces and internal flow paths often feature stainless steel components for corrosion resistance and food safety. The outer housings, crafted from high-grade plastics, meet FDA and NSF standards, reducing weight and resisting impact.

Seals and gaskets, typically made from silicone or rubber elastomers, are strategically placed at motor shafts, housing joints, and inlet/outlet fittings. They ensure a watertight system and withstand temperature fluctuations. Ceramic-coated shafts and hard-coated impellers are used to enhance wear resistance, extending the system’s lifespan under frequent use.

Modular designs facilitate quick flojet parts replacement, such as diaphragms, check valves, and tubing. This approach minimizes downtime and reduces ownership costs over time.

Comparing Flojet Pump Types And Models

When selecting a pump, consider your flow requirements, available space, and the dispenser’s intended use. Flojet offers a variety of pumps, from high-pressure units for high-traffic areas to compact models for mobility. This guide will help you choose the right pump for your office water dispenser, event cart, or commercial bottled water setup.

High-pressure bottled water pumps provide rapid flow and consistent delivery, ideal for areas with multiple users. These pumps, often rated near 60 PSI, come with an automatic pressure switch for efficient operation. They’re perfect for busy break rooms, cafeterias, gyms, and hospitality settings where reliable hot/cold dispensers are essential. Expect robust construction and self-priming capabilities, though they may generate more noise and consume more energy.

Compact and portable Flojet pumps are designed for smaller spaces, such as kiosks, RVs, labs, and small offices. These pumps prioritize space efficiency and ease of installation. They’re great for field events and temporary hydration stations, with single-inlet designs like the flojet bw5000 series being common.

Pumps with multiple outlets serve multiple dispensing points from a single source, reducing the need for duplicate units. Ideal for schools, large offices, and high-traffic retail areas, these pumps require more complex plumbing and a larger initial layout. Despite this, they offer operational efficiency and consistent pressure across outlets, making them a worthwhile investment.

Pumps with integrated filtration combine pumping and treatment to enhance water quality. These systems remove chlorine, sediment, and other impurities during dispensing. They’re perfect for healthcare and education settings. While filtration adds maintenance requirements, with cartridges needing replacement every 6–12 months, it slightly reduces maximum flow.

  • Electric water pump models vary in duty cycle and noise, and commercial settings should use units rated for continuous operation.
  • Where demand is heavy, higher-flow and higher-pressure bottled water pump commercial models are the better choice.
  • In smaller spaces, portable bottled water pump units and compact Flojet pump models make installation easier.

Pump Performance Specifications To Consider

When selecting a Flojet pump, it’s essential to set clear performance goals. Ensure the pump’s specs align with your dispenser’s use. This ensures the flow and pressure meet your needs without wasting energy. Even small upgrades can significantly enhance the user experience in various settings.

Flow rate (GPM) and matching the pump to demand

The flow rate GPM indicates the speed at which water is dispensed. Home pumps usually operate at 0.2–0.5 GPM, while commercial units can reach 0.5–1.0+ GPM. When choosing, consider the bottled water pump flow and model specifications, such as the flojet bw5000 flow. Assess peak usage scenarios and select a higher GPM for high-traffic areas like gyms or cafeterias to minimize wait times.

Pressure ratings (PSI) for home and commercial needs

PSI ratings are critical for ensuring proper water flow to temperature-controlled tanks and multiple outlets. Residential setups typically require 20–40 PSI, while commercial environments need 40–60 PSI. It’s vital to match the pump’s pressure rating with the dispenser’s design to avoid overpressure or poor flow. This is even more important for systems that handle both hot and cold water.

Noise level and motor design in quiet settings

In quiet environments like offices, clinics, and libraries, noise level is a significant factor. Opt for low-noise Flojet models with sound levels under 45 dB. Features such as vibration isolation, balanced diaphragms, and sealed motors contribute to reduced noise. For extremely quiet environments, consider a quiet water pump or add insulation at the mount.

Energy consumption and efficiency considerations

Most consumer and small commercial pumps operate in the 30–60 W range on 110–120V AC. Higher flow and pressure rates increase energy consumption. An energy-efficient pump can lower operational costs and reduce waste during idle periods with features like automatic shutoff and thermal protection. Balance the pump’s efficiency with your expected dispense time and daily volume.

  • Match bottled water pump flow to the number of peak users and outlets.
  • Check PSI ratings against dispenser limits to protect system components.
  • Prioritize low-noise Flojet or quiet water pump options for sensitive spaces.
  • Compare flojet bw5000 flow and flojet energy use when weighing efficiency.

Maintenance And Repair Basics For Flojet Parts

Regular maintenance of a bottled water dispenser is key to its longevity. A simple routine can prevent costly service calls. Start by inspecting the exterior, bottle neck adapters, and tubing weekly. Sanitize components as recommended by the manufacturer to maintain cleanliness.

Routine maintenance for the water pump

  • Clean bottle fittings, tubing, and inlet strainers to prevent sediment buildup.
  • Check silicone and rubber seals for brittleness or cracking and replace if worn.
  • In filtered models, replace cartridges every 6–12 months to maintain strong flow and good taste.

Common repairs and pump troubleshooting

Issues like no flow or low flow often stem from bad bottle connections, kinks in tubing, clogged filters, or worn diaphragms. Always check for power and automatic shutoff sensors. Leaks usually result from seals, hose clamps, or fittings; replace damaged gaskets and tighten fittings. Excessive noise or vibration can signal loose mounting hardware, worn diaphragms, or motor bearing issues.

When overheating or dry-run problems occur

  • Dry-run conditions can damage seals and diaphragms, so verify dry-run protection and inspect parts after the event.
  • Overheating may be caused by blocked vents or excessive use beyond the rated duty cycle, so allow the motor to cool and inspect the protection devices.

Common replacement parts

Common service parts include diaphragms for Flojet, elastomeric seals and gaskets, check valves to prevent backflow, and replacement tubing with compatible fittings. Diaphragms and seals wear out with heavy use or thousands of cycles. Tubing may discolor or harden, requiring replacement when deterioration is evident.

Repair kits and flojet pump repair parts

  • Repair kits often bundle diaphragms, O-rings, and check valves for straightforward field servicing.
  • Order flojet pump repair parts that match model numbers, pressure and flow specs, and bottle connection type for correct fit.

Where to source genuine parts and repair help

For replacement components, choose genuine Flojet parts to ensure material safety for potable water. Installation Parts Supply Flojet parts are available through a plumbing wholesale distributor channel for contractors and facility managers. Authorized Flojet service centers and Installation Parts Supply can offer technical guidance on model compatibility and water dispenser troubleshooting.

Helpful sourcing tips

  • Always reference the serial number and pump model when purchasing flojet parts.
  • Maintain a small inventory of diaphragms for Flojet, replacement tubing, and check valves to reduce downtime.
  • Filtered water helps reduce sediment and mineral buildup, lowering long-term maintenance needs.

Residential And Commercial Uses For Bottled Water Dispensers

Flojet pumps are versatile, fitting into various settings where clean drinking water is essential. They power both bottom-load and plumbed bottled water coolers, providing hot and cold water without the need for heavy lifting. This efficiency streamlines beverage preparation, reducing strain on employees and family members alike.

Office water dispenser and break room water cooler installations benefit from high-pressure or multi-outlet pumps in larger settings. For smaller kitchens and shared workspaces, compact pumps are ideal. Regular maintenance ensures the water remains fresh and meets high sanitation standards.

Gym water dispenser stations and school water cooler installations require steady flows and frequent use. Durable, corrosion-resistant materials and scheduled cleaning are essential for these high-traffic areas. This setup supports refill stations in fitness centers, lockers, cafeterias, and hallways effectively.

Retail kiosks and pop-up vendors benefit from compact or multi-outlet bottled water cooler setups. Portable units are perfect for high-traffic points. Event teams rely on a reliable event hydration pump for conferences and outdoor gatherings, ensuring a steady supply of water.

Hospitality teams use a quiet hospitality water pump for catering and guest areas, providing hot and cold drinks without plumbing changes. Portable Flojet-powered dispensers are ideal for catering tents, banquet rooms, and temporary serving lines.

Industrial sites install rugged pumps into an industrial hydration station to reduce heat stress and keep crews hydrated. Some facilities use pumps for non-potable tasks like rinsing tools, where on-demand flow and portability are key.

At home, a home water dispenser or bottled water cooler home offers chilled or heated water without altering plumbing. Countertop and bottom-load systems with a small Flojet pump meet family needs, workshops, and small home offices.

For leased units and temporary needs, Flojet solutions provide a simple leased space water solution. They install and remove without permanent changes. Choosing a temporary water dispenser or bottled water pump home for events and short-term rentals cuts infrastructure costs while maintaining professional service.

  • Office efficiency: reduces downtime during bottle changes and speeds up beverage preparation.
  • High-traffic venues: use high-flow pumps and corrosion-resistant parts.
  • Portable needs: enable pop-ups, trade shows, and temporary catering.
  • Residential convenience: serves workshops, kitchens, and home workspaces effectively.

How To Choose The Right Flojet Bottled Water Dispenser For Your Needs

Begin by evaluating your demand: consider daily usage, peak hours, and the number of users at once. This will help you determine the necessary flow rate and whether a multi-outlet system is essential. Calculate the gallons per minute (GPM) needed for your busiest hour. This step ensures you select a Flojet Bottled Water Dispenser that meets your needs without overspending.

Next, assess the pressure and location requirements. For residential settings, 20–40 PSI is usually sufficient. Commercial environments often need 40–60 PSI. If noise is a concern in an office or hospitality setting, opt for pumps with a noise level under 45 dB. Also, ensure compatibility with dispenser heads and any temperature control systems you plan to use.

Think about the materials, filtration, and serviceability of the dispenser. Opt for units with stainless steel wetted parts, food-grade plastics, and durable seals to enhance longevity. Consider if integrated filtration is necessary and factor in the cost of filter replacements every 6–12 months. Verify access to genuine Flojet parts, such as diaphragms, seals, check valves, and tubing, from trusted suppliers like Installation Parts Supply for repair kits and technical assistance.

Balance your budget with the total cost of ownership. While many consumer pumps near $100–$120 offer high flow rates, consider long-term expenses like energy use and filter replacements. Cross-check model numbers for accuracy—bw5000 flojet selection is a good example to confirm specifications. When replacing a unit, bring the existing model/serial information to your distributor. Prioritize sealed motors and dry-run protection for reliable, low-maintenance performance suitable for both home and commercial use.

The Applications of a 3/4 Compression Fitting Copper in Irrigation

Ever wonder if a 3/4″ copper compression union can seal leaks more quickly than soldering or push-fit repairs? This overview highlights the 3/4″ Copper Compression Union as a dependable, contractor-grade plumbing connector. It works well for both DIY homeowners and professional plumbers. This union delivers a quick solution, frequently avoiding the need for a torch, dedicated solder, or prolonged downtime.

This webpage is about Compression Fitting 3/4
Its design is simple, using a nut and ferrule to form a tight, leak-proof seal on copper tubing. Because of this simplicity, it remains a favored option and is stocked by wholesalers such as Installation Parts Supply for same-day shipping on urgent repairs.

The following sections explain how the 3/4″ copper compression union works. We will cover its benefits compared with brass and push-fit alternatives and offer step-by-step guidance for a durable, long-lasting connection.

What A 3/4″ Copper Compression Union Is And How It Functions

A 3/4 inch copper union is a straightforward copper pipe fitting used to join two pipe ends of the same nominal size without soldering. It includes a union body, two nuts, and ferrules. This design is ideal for repairs, accessible joints, and installations where heat from soldering is not an option.

Compression union definition

A compression union creates a removable mechanical joint by compressing ferrules onto pipe ends as the nuts are tightened. Those ferrules lightly deform and bite into the pipe outer diameter to create a tight seal against the union body. This fitting is often used by plumbers for quick replacements and easy-to-service connections in supply lines.

How the compression action creates a leak-proof seal

When each nut is turned, the ferrule is driven inward. The ferrule compresses evenly around the pipe and seats into the union body. Correct alignment and recommended torque produce a leak-proof connection suitable for potable water. Tightening too little risks seepage, while overtightening can distort the ferrule and spoil the seal.

Why copper is used: corrosion resistance and durability

Copper’s natural corrosion resistance and dimensional stability give the 3/4 inch copper union long service life. Compared to many plastics and some metals, copper fittings resist degradation under typical water conditions. This reliability makes copper a preferred material for durable, long-lasting plumbing repairs.

Feature 3/4 inch copper union Common alternative
Material Copper Brass or plastic
Seal method Ferrule-based compression sealing for a leak-proof connection Push-fit fittings or soldered joints
Serviceability Can be removed for repairs Push-fit can be removable, while soldered joints are permanent
Corrosion protection High Variable; brass is good, and some plastics are inert
Common uses Quick fixes, line transitions, and accessible joints Long runs, concealed soldered connections

Copper Compression Union

Benefits Of Using A Copper Pipe Fitting For Repairs

For plumbing repair parts, the right choice is important for long-term performance. Copper pipe fittings stand out due to their strength and proven longevity in both potable water and HVAC systems. A high-quality copper compression union ensures a durable joint, capable of withstanding mechanical stress and routine maintenance.

Durable copper union compared with brass and plastic alternatives

Copper unions provide high mechanical strength and are less likely to deform under tightening torque. Unlike brass compression couplings from brands such as Thrifco Plumbing, copper is often more naturally compatible with copper piping. Although plastic push-fit couplings install quickly, they do not match copper for heat resistance and long-term durability, especially in high-use or high-temperature environments.

Corrosion-resistant union for dependable long-term service

Copper is highly resistant to common corrosion found in potable water systems. A corrosion-resistant union can lower the likelihood of pinhole leaks and mineral attack when it is installed correctly and matched with compatible metals. Regular checks and balanced water chemistry help ensure the fitting remains a reliable plumbing repair part over the long term.

Applications where copper compression unions are preferred

Copper compression unions are commonly chosen for residential potable water lines, HVAC supply and return lines, and commercial jobs where durability matters most. They are ideal for situations where disassembly or future service is anticipated, benefiting both contractors and homeowners. Wholesalers like Installation Parts Supply carry contractor-grade copper unions for these typical applications.

Material, Size, And Compatibility Considerations

When selecting a plumbing connector, material and size are crucial. Copper unions are known for their corrosion resistance and clean appearance. Before installation, it is important to verify whether the fitting is sized by nominal pipe size or outside diameter.

3/4 inch copper union size details matters greatly, especially when IPS or OD standards must be considered. A 3/4 inch copper union typically matches 3/4″ IPS, but copper tubing is sold by OD. Always review product specifications and measure the tube OD to avoid mismatches, especially in tight spaces.

Compression fitting compatibility details can vary by manufacturer and pattern. Many compression unions work with hard copper tubing. However, for PEX or CPVC, use adapter fittings approved by the piping material’s maker to ensure warranty and code compliance.

The best choice between a compression fitting, a soldered joint, and a push-fit connection will depend on the job requirements. Compression fittings are especially useful for quick repairs, removable joints, or situations where heat cannot be used. Soldered connections are best for permanent, tamper-resistant seals in concealed installations. Push-fit fittings offer tool-free installation but have limitations on pressure, temperature, and longevity.

Prior to purchase, make sure the fitting is either short pattern or standard pattern to ensure proper clearance. You should also measure the nut and ferrule stack and confirm whether the product specifies compatibility as a defined combination, such as a brass coupling for IPS instead of copper OD. That extra check can save you from needless trips and repeat orders.

Factor Compression Union Soldered Joint Push-Fit
Speed of installation Fast, with limited tools Slower, requires torch Fastest, tool-free
Serviceability Removable Permanent Removable on some models
Ideal use Repairs, heat-sensitive areas Hidden permanent lines Quick installs, temporary or where approved
Material compatibility Copper tubing; adapters for PEX/CPVC Mostly copper and brass Varies by manufacturer, some PEX/Copper
Sizing guidance Check 3/4 inch copper union sizing carefully (IPS vs OD) Match the tube OD and wall thickness Refer to the maker’s sizing guide

Step-By-Step Installation Guide For An Easy Installation Fitting

Follow this clear install guide to fit a 3/4″ copper compression union with confidence. The instructions below explain the tools, preparation, assembly, torque guidance, and leak inspection needed for a dependable plumbing connector installation. You can source the parts from Installation Parts Supply or nearby plumbing wholesalers for contractor-grade quality and, where offered, same-day pickup.

Tools and preparation

Collect two adjustable wrenches or a wrench with an adjustable spanner, plus a tube cutter, a deburring tool or file, and a torque wrench if exact tightening is preferred. Purchase ferrules, nuts, and the union body from Installation Parts Supply or a nearby plumbing wholesaler to ensure job compatibility. It also helps to keep a clean rag and flashlight on hand.

Preparing the pipe ends and parts

Cut the copper pipe square with a tube cutter. Remove burrs and sharp edges with the deburring tool so the ferrule seats evenly. Make sure the pipe OD is free of oxidation, paint, and debris. Slide the nut onto the pipe with the threaded end facing the union, then slide the ferrule on in the correct orientation before inserting the pipe into the union body.

Compression union assembly

Insert the pipe completely into the union until it reaches the stop. Hand-tighten the nuts on both sides to begin. Hold the union body with the adjustable wrenches and tighten the nut carefully. For most fittings the guideline is the specified number of turns past finger-tight provided by the manufacturer or a torque value if supplied.

Torque guidance and common mistakes to avoid

Avoid overtightening, as excessive force may deform the ferrule or the pipe and create leaks. If a torque wrench is available, use the manufacturer’s recommended torque setting. When no torque value is provided, tighten gradually to about one to one-and-a-quarter turns past finger-tight, then pressure-test the joint. Re-check torque after initial pressurization.

Leak inspection and final steps

Restore water pressure, then check the joint for any visible weeping. Use a dry cloth or paper towel to spot slow leaks around the compression fitting. If a small weep appears, tighten the connection slightly. If leaking persists, depressurize the system and take apart the joint so you can inspect or replace the ferrule and nut before reassembly.

Step Action Tip
1 Source your tools from Installation Parts Supply or a nearby wholesaler Choose contractor-grade ferrules and nuts for durability
Step 2 Cut the pipe square and deburr it Clean OD to ensure proper ferrule seal
3 Place the nut first, then the ferrule, onto the pipe Orient ferrule per manufacturer guidance
Step 4 Insert pipe fully into 3/4″ copper compression union and hand-tighten Begin with even hand-tightening on both nuts
5 Wrench tighten to specified turns or torque Do not overtighten, as it can cause deformation
6 Restore pressure and inspect the joint for leaks Use a towel to find slow weeps, and relieve pressure before disassembly

Common Troubleshooting Tips And Quick Connect Fixes

Small leaks at a compression joint often appear as a steady drip at the nut or slight weeping after the system is pressurized. Start by confirming that the line pressure is off and the area around the joint is dry. Check the pipe end, the nut, and the ferrule for visible damage before deciding the body is the problem.

Finding and fixing minor leaks

As a basic quick connect fix, tighten the nut according to the manufacturer’s recommended turns. If leaking continues, shut down the pressure and disassemble the joint. Check the ferrule for nicks, flattening, or distortion, and inspect the nut threads for wear. If the pipe end shows damage, cut it back, deburr it, and reassemble with a fresh ferrule and correct torque to reestablish a leak-proof connection.

When ferrules or the whole compression fitting should be replaced

Ferrules should be replaced when they show obvious deformation or installation cuts. Replace the whole compression union if the nut, body, or threads are cracked, corroded, or stripped. Repeated leaks at the same joint suggest a material or alignment issue; consider a higher-grade contractor fitting from a reputable supplier or switching to a soldered joint for a more permanent leak-proof connection.

Maintenance tips to avoid overtightening or misalignment

When assembling the joint for the first time, do not overtighten it. Begin by hand, then finish with the recommended torque or the specified turns past finger-tight. Maintain proper pipe alignment so the ferrule seats evenly instead of biting at an angle. After installation, inspect the joints once, then check them again under normal service pressure. Regular inspections can reduce future compression fitting troubleshooting and help identify early wear before a leak forms.

Issue Likely Cause Quick Fix When to Replace
Drip at nut Minor ferrule seating issue or loose nut Tighten to manufacturer turns; retest under pressure Persistent drip after reassembly
Weeping after installation Debris, imperfect cut, or misaligned pipe Depressurize the line, re-cut, deburr, and reseat the ferrule Ferrule shows distortion or cuts
Leak appears under load Cracked nut or stripped threads Replace the nut, then retest Body or threads damaged; replace entire fitting
Recurring leaks at one joint Poor alignment or the wrong fitting grade Realign the pipe and use the correct installation torque Use a better-grade fitting or switch to a soldered joint

Buying Guide: How To Select The Right Plumbing Connector From A Wholesale Distributor

Begin by examining the material specifications and certifications. Make sure the plumbing connector is rated for potable water, carries manufacturer certification, and includes a contractor-grade warranty. Also verify whether the fitting is short pattern or standard pattern and make sure the ferrules and nuts are included. Before buying, it is essential to match the fitting to the correct pipe OD or IPS so returns can be avoided.

Look for corrosion-resistant features and dependable brands like Mueller Industries, NIBCO, and Viega. A durable copper union often surpasses cheaper options in corrosive environments. Consider the installation needs and compatibility with adapters, especially for mixed-material systems like copper-to-PEX.

Because Installation Parts Supply stocks contractor-grade copper unions, ferrules, nuts, and compatible adapters, job-site procurement can move more quickly. They offer same-day shipping for in-stock items when time is of the essence. For larger orders, contact sales or customer support and cross-check part numbers to confirm exact matches.

Value should be assessed by lifecycle cost, not just the initial purchase price. Brass compression couplings, including those from Thrifco Plumbing, may look less expensive online. Even so, the decision should also account for longevity, corrosion resistance, and ongoing maintenance needs. Although a copper union may have a higher initial cost, it can offer lower lifetime costs in aggressive water conditions.

Be aware of manufacturer MAP policies that influence visible online discounts. Retailers may withhold advertised reductions until checkout, so request a final quote for accurate comparisons. You should also ask wholesalers about contractor pricing, returns, and warranty handling to identify the real value of the offer.

If you’re looking for a quick comparison, consider a short checklist:

  • Material and certification for potable water
  • Ferrules, nuts, and adapters included
  • Compatibility with pipe OD/IPS
  • Brand reputation and contractor-grade quality
  • Total price after MAP, shipping, and warranty considerations

Apply this checklist when buying from Installation Parts Supply or a local wholesale distributor. That approach helps you choose a plumbing connector that offers the right mix of performance, durability, and cost for the job.

Safety, Codes, And Best Practices For Plumbers And DIY Users

Any work involving a 3/4″ copper compression union requires careful adherence to safety rules and local regulations. It is important to confirm all required rules before starting the job. Even simple repairs demand caution, especially when following regulated procedures.

Local code considerations in the United States for compression fittings

In the United States, local jurisdictions often have their own rules for compression fittings. Many jurisdictions allow these fittings on both cold and hot water lines as long as they are listed for safe use. Some inspectors, however, may limit particular ferrule types or require brass components that carry certain certifications. Before installing a compression union, always check the local plumbing code requirements and confirm what your inspector expects.

Safe handling of copper fittings and working with pressurized systems

Always make sure the line is depressurized and drained before loosening any nut. Wear protective eyewear and gloves resistant to cuts when cutting copper pipe. Have a fire shield and a Class B-C extinguisher ready if you decide to solder instead of using compression fittings. Although compression fittings remove the need for heat, they still demand a secure and tidy assembly.

When a licensed plumber should be called instead of attempting DIY repair

For jobs involving gas piping, concealed or difficult-to-access lines, or multi-story risers, hiring a licensed plumber is the best option. They can ensure compliance with fitting codes, select the correct materials for safe use, and safely restore pressurized systems.

Situation DIY OK Call a Licensed Plumber
Simple supply-line leak at an accessible union Usually yes No, unless the leak happens again
Repairs inside concealed walls or ceilings No Yes, definitely
Gas piping or combined mechanical systems No Yes
Uncertainty about local compression fitting codes No Yes, call a professional
Replacing a simple plumbing repair part like a ferrule or nut Yes, with proper tools Yes, if the repair does not seal properly

Closing Summary

A 3/4″ copper compression union is a durable plumbing connector suited to many repair and joining tasks. A corrosion-resistant copper body combined with a correctly installed ferrule helps create a leak-proof connection. This result depends on preparing the pipe ends correctly and tightening the union to the proper torque.

Selecting a contractor-grade, easy installation fitting from trusted suppliers such as Installation Parts Supply supports dependable part quality. It also makes same-day shipping possible when time matters most. Prior to purchase, it is wise to compare copper unions with brass compression couplings and push-fit options. Doing so helps determine which option best fits compatibility needs, long-term durability, and the demands of the job.

Be sure to comply with local codes and use the right tools for the installation. After pressurization, inspect the joints to verify a secure, leak-proof connection. Replace ferrules or fittings if they show signs of wear. If the repair is beyond your comfort level or raises code concerns, it is best to call a licensed plumber. This helps keep the system safe and compliant.

Why Fitting Sanitary Connections Are Critical in Food Processing

It is a fact that a single microscopic residue left inside a processing line can stop production and cost tens of thousands of dollars in lost product and cleaning time. This risk makes stainless steel sanitary pipe fittings critically important in food, beverage, dairy, and pharmaceutical plants.

This site is about Tri-Clamp Fittings Catalog
Premium sanitary fittings ensure secure connections, reliable sealing, and surfaces that withstand repeated cleaning and inspection. Manufacturers focus on ISO 9001-certified quality systems and tight tolerances. This ensures parts perform, fit, and finish as designed.

Using sanitary pipe fittings stainless and food-grade pipe fittings places priority on contamination control, traceability, and ease of maintenance. From tri-clamp and butt-weld fittings to clamps and gaskets, ss sanitary fittings are designed for fast disassembly and thorough cleanability. This keeps lines moving and audits passing.

Why Choose Premium Stainless Steel Hygienic Fittings For Food, Beverage, And Pharma

The food, beverage, dairy, and pharmaceutical sectors require parts that prevent contamination and support traceability. High-quality stainless steel hygienic fittings offer smooth, crevice-free joints and finishes. These features reduce bacterial harboring, making cleaning cycles easier and helping plants meet strict sanitation standards.

Sanitary tubing fittings and food-grade pipe fittings are designed for frequent washdowns and chemical exposure. Their polished surfaces and gasket materials withstand heat and sanitizers, reducing risk during processing and transport. Production teams benefit from fittings that allow for quick disassembly for inspection and cleaning.

Compliance with hygiene and safety standards

Processing facilities rely on fittings that meet FDA, 3-A, and USP contact requirements for food and pharmaceutical surfaces. Traceable manufacturing records and ISO 9001 systems support batch recalls and audits. Choosing certified hygienic fittings simplifies validation and keeps operations audit-ready.

Benefits of stainless steel as a material

Stainless steel provides corrosion resistance and mechanical durability, helping maintain leak-free lines under pressure. It outlasts alternative metals or plastics, preserving product purity. Many plants standardize on stainless for sanitary valves and fittings to simplify inventory.

Quality assurance and certification

Buyers appreciate suppliers that inspect surface finish, complete passivation, and provide mill test documentation. Independent inspection and certification ensure sanitary tubing fittings meet dimensional and material specs. Fast fulfillment and documented quality build trust with processors who cannot risk downtime.

Tri Clover Sanitary Fittings

Main Types Of Stainless Steel Sanitary Pipe Fittings

Understanding common sanitary components is vital for engineers and buyers. It ensures systems meet the needs of food, beverage, and pharmaceutical industries. The right combination of tri-clamp assemblies, butt-weld joints, valves, and spool elements keeps lines sanitary and leak-free.

Tri-Clamp Fittings, Tri Clover Pipe Fittings, And Triclover Fitting Overview

Tri-clamp fittings are known for their quick assembly and disassembly. This makes them ideal for routine cleaning and inspection. A tri clover pipe fittings design includes a ferrule, gasket, and clamp, creating a hygienic seal common in CIP systems.

When choosing tri-clamp fittings, review a detailed catalog. It should list ferrule sizes, clamp styles, and compatible sanitary gaskets. This ensures parts are compatible. The triclover fitting is a popular choice for its fast and repeatable joints.

Butt-Weld Sanitary Fittings And Sanitary Weld Fittings

Butt-weld sanitary fittings form permanent, crevice-free joints when welded to matching pipe. These joints are ideal for applications where microbial traps are a concern and strict surface finish requirements must be met.

Choose butt-weld sanitary fittings when a smooth flow path is essential. They are best for applications where frequent disassembly is not required.

Sanitary Valves And Fittings, Sanitary Coupling, And Sanitary Hose Fittings

Flow control is handled by sanitary valves and fittings while product integrity is preserved. Common types include ball, butterfly, and diaphragm valves, all made in polished stainless steel.

Sanitary coupling and hose fittings link flexible lines to rigid piping. It’s important to choose couplings rated for pressure and temperature conditions to avoid failures in process lines.

Sanitary Tube Components And Sanitary Spools

Sanitary spool tubes and spool components allow for the creation of custom-length runs with welded ends or tri-clamp interfaces. These spool assemblies speed up installation and reduce the need for on-site welding.

Ordering is simplified when catalogs combine sanitary spool tubes with matching clamps and fittings. This also enhances traceability for validation files.

Specialized Parts: Clamps, Gaskets, And Sanitary Clamps

Sanitary clamps and gaskets may be small, but they help keep systems sealed and easy to service. The material choice for gaskets affects cleanability and chemical resistance.

A detailed tri-clamp fittings catalog, along with quality clamps, helps prevent downtime. Many buyers appreciate timely shipping and reliable fit from established suppliers when sourcing CSI parts and manufacturer-standard components.

Understanding Stainless Steel Sanitary Pipe Fittings

High-quality sanitary pipe fittings help maintain clean flow, support easy maintenance, and extend system life in food, beverage, and pharmaceutical environments. This section delves into the common materials and grades used, the manufacturing processes, and how to select the appropriate fitting for a specific task. It also covers compatibility and the availability of parts.

Materials And Grades Commonly Used

Stainless steel is the preferred choice for sanitary applications due to its corrosion resistance and cleanability. The industry standard includes Types 304 and 316L, with 316L being the preferred option for more aggressive chemistries. For biopharma applications, BPE grade stainless and electropolished finishes are favored for their surface integrity and traceability.

In some cases, buyers request copper tri clamp fittings for specific applications. It is important to confirm the compatibility of copper parts with the process and ensure sanitary acceptability before installation.

Manufacturing Processes And Surface Finish

Manufacturing begins with certified raw materials, followed by precision machining, welding, and finishing. Skilled TIG welding and orbital welding are employed to create smooth, crevice-free joints, minimizing contamination risk.

Surface finishing methods include everything from buffed finishes to electropolish. Electropolishing significantly reduces surface roughness, making cleaning easier for stainless steel sanitary fittings and sanitary weld fittings. Quality control measures include dimensional checks, surface roughness testing, and traceable material certificates, such as ISO 9001 paperwork.

Selecting The Right Fitting For Your Application

The right fitting should be selected by matching it to the required pressure, temperature, and media conditions. Stainless steel tube fittings and sanitary pipe fittings serve different purposes; the selection should be based on the connection type and cleanability needs. For instance, tri-clamp style connections facilitate quick disassembly for cleaning, while sanitary weld fittings create permanent, smooth joints.

CSI fittings should be considered for standardized instrumentation or processes requiring interchangeability. Keeping spare parts for pumps, valves, and spools on hand can also reduce downtime.

System Compatibility And Parts Availability

System compatibility is determined largely by standards and dimensions. Common standards include tri-clamp, DIN, SMS, and ISO. It is essential to verify flange styles and gasket types before ordering to avoid mismatches.

Inventory levels and lead times are critical factors in maintaining uptime. Distributors that stock stainless steel sanitary fittings, sanitary weld fittings, and copper tri clamp fittings can expedite repairs. A clear bill of materials and part numbers ensures quick and accurate fulfillment.

Selection Factor Typical Material / Grade Why It Matters
General food & beverage use Type 304, Type 316L Good corrosion resistance and cleanability for most processes
Biopharma and critical sanitary use BPE grade stainless, electropolished 316L Ultra-smooth surfaces and traceability help reduce contamination risk
Permanent sanitary welded lines 316L paired with sanitary weld fittings Smooth flow, crevice-free joints, and low maintenance
Quick disconnect applications Tri-clamp style in stainless or copper tri clamp fittings Fast cleaning and replacement; check material compatibility
Instrumentation and specialty CSI fittings with precision tube fittings Provides standardized interfaces for easier system integration

Working With A Reliable Plumbing Wholesale Distributor

Choosing the right plumbing wholesale distributor is critical for maintaining uptime and adhering to regulations. Look for a partner with a wide range of sanitary fittings and transparent product information. This includes tri-clamp, butt-weld, and spool components. Quick delivery and clear communication are essential to minimize downtime on food, beverage, and pharmaceutical production lines.

Distributors should carry certified stainless steel clamp fittings as well as sanitary valves and fittings. They should also have traceable batch records. ISO 9001-certified manufacturers ensure consistent quality and can fabricate parts to match factory specifications.

Customer reviews are a good indicator of a distributor’s lead times and shipping performance. Opt for a distributor that offers fast next-day fulfillment or reliable short lead times. A distributor that promises rapid delivery should also provide inventory visibility and proactive order updates.

Examine their testing and traceability practices. Request material certificates, surface finish data, and weld inspection records. Clear documentation is vital for audits and maintaining systems free from contamination risks.

Technical support is essential when selecting sanitary coupling types, clamps, and gaskets. A knowledgeable team can guide you in choosing the right size, finish, and sealing option for CIP systems. They should also offer custom fabrication for unique spool or adapter pieces.

As a plumbing wholesale distributor, Installation Parts Supply stands out for its wide selection of stainless steel sanitary pipe fittings. They offer responsive service and access to certified suppliers. Their catalog includes a variety of sanitary fittings, such as tri-clamp, sanitary coupling, clamps, and sanitary valves and fittings, catering to processors across the United States.

Selection Criterion What You Should Expect Why It Matters
Inventory Depth A comprehensive sanitary fittings catalog with stocked stainless steel clamp fittings Faster fulfillment and fewer production delays
Documentation Quality Material certs, weld reports, ISO 9001 traceability Supports audits and ensures hygienic integrity
Shipping and Lead Time Clear tracking, next-day options, and reliable carriers Helps reduce downtime and costly emergency sourcing
Technical Guidance Guidance on applications, custom fabrication, and specifications Supports correct component selection for strong system performance
Breadth of Products Tri-clamp, butt-weld, spool tubes, clamps, gaskets, and sanitary valves and fittings Provides single-source convenience for full system builds
Reputation Reviews, references, and case studies Predictable service and proven delivery

Closing Summary

High-quality sanitary fittings are critical in food, beverage, dairy, and pharmaceutical processing. They ensure uptime and safety. Stainless steel hygienic fittings offer crevice-free surfaces, reliable sealing, and easy cleaning. Types like tri-clamp, butt-weld, and spool tube assemblies provide secure connections and meet strict hygiene standards.

Careful consideration is required when choosing sanitary tubing fittings and ss sanitary fittings. Material grade, surface finish, and certified manufacturing are key. Suppliers with ISO 9001 processes and traceability ensure part performance. This validation is essential for audits and daily operations.

Work with a distributor that provides verified inventory, fast fulfillment, and technical support. Installation Parts Supply is a U.S. supplier that meets these criteria. They provide stocked product, testing documentation, and custom fabrication. This ensures lines run smoothly and comply with regulations. Sourcing sanitary valves and fittings carefully protects product safety and operational efficiency.

Glycol Power Packs for Temperature Control

Optimize Cooling with Glycol Chiller Power Packs

You are welcome to our informative article regarding how to optimize cooling with glycol chiller power packs. Whether you’re within the food and beverage industry, commercial refrigeration, or any other sector that relies on precise temperature control, utilizing glycol chiller power packs can greatly improve your cooling efficiency.

In relation to maintaining the desired temperature in diverse cooling systems, for example draft beer dispensing or pharmaceutical production, glycol power pack offer undeniable benefits. They work by circulating an antifreeze mixture, typically referred to as glycol, and also hardwearing . cooling system performing optimally. By utilizing these power packs, there is no doubt that the cooling needs are met efficiently and effectively.

In this article, we’ll explore the important points of what glycol chiller power packs are, the direction they function, and the advantages they give in terms of cooling efficiency. We’ll also explore essential topics such as installation and setup, factors to consider when choosing the proper power pack, maintenance and care tips, and real-world applications. In the end, you’ll use a comprehensive understanding of how glycol chiller power packs can revolutionize your cooling capabilities.

So, let’s dive in and learn tips on how to optimize your cooling systems together with the power of glycol chiller power packs. Whether you’re a skilled professional or a new comer to the world of cooling technology, this article offers you invaluable insights to boost your operations and maintain precise temperature control.

Understanding Glycol Chiller Power Packs

In this particular section, we shall offer a comprehensive understanding of glycol chiller power packs as well as their purpose in maintaining temperature control in several systems. One of the key applications of glycol chiller power packs is draft beer dispensing, where they play a crucial role in ensuring the perfect pour.

In terms of serving beer, maintaining an ideal temperature is essential for preserving flavor and quality. Glycol chiller power packs use an assortment of glycol and water, typically referred to as an antifreeze solution, to achieve temperature control. This option would be circulated through beer lines to maintain the beverages consistently cool, even during long periods of dispensing.

The constant circulation of your antifreeze mixture through beer lines is exactly what prevents the beer from getting warmer. This setup not simply helps keep up with the desired serving temperature but additionally ensures that every glass of beer is poured at its best, building a memorable experience for beer enthusiasts.

Glycol chiller power packs end up being indispensable in establishments like bars, restaurants, and breweries, where maintaining the quality and taste of draft beer is so critical. By offering a reliable and precise temperature control solution, these power packs play a crucial role in elevating the beer drinking experience.

Installation and Setup Techniques for Glycol Chiller Power Packs

Proper installation and setup are essential for ensuring the effective operation of glycol chiller power packs. Following the best procedures and steps, you are able to optimize the performance of the cooling system and look after the specified temperature. Here are a few essential ideas to consider:

Positioning the Power Pack

When installing a glycol chiller power pack, it’s crucial to select a suitable location. Ensure proper ventilation and sufficient space around the unit for proper airflow and maintenance access. Avoid placing the power pack near heat sources or even in sunlight. Ideally, the power pack needs to be placed in a cool, dry, and well-ventilated area.

Connecting the Glycol Lines

Carefully stick to the manufacturer’s instructions for connecting the glycol lines on the power pack. Be sure that the connections are secure and leak-free. Properly insulate the glycol lines in order to avoid temperature fluctuations and look after the preferred cooling efficiency. Regularly inspect the lines for virtually any warning signs of wear or damage and address them promptly to avoid interruptions inside the cooling system.

Setting the preferred Temperature

As soon as the power pack is installed as well as the glycol lines are connected, it’s important to set the required temperature for the cooling system. Reference the manufacturer’s guidelines for specific instructions on temperature control. Adjust the temperature according to your needs, considering factors such as the type of application, ambient temperature, and cooling load. Regularly monitor and calibrate the temperature settings to ensure consistent and accurate cooling performance.

By using these installation and setup tips, you can ensure an appropriate and efficient integration of glycol chiller power packs into the cooling system. This helps optimize cooling performance, extend the lifespan of the equipment, and provide reliable temperature control for a variety of applications.

Selecting the most appropriate Glycol Chiller Power Packs

When it comes to deciding on the perfect glycol chiller power packs to your cooling needs, several factors must be taken into consideration. By evaluating cooling capacity, system requirements, energy efficiency, and other key factors, you can ensure the optimal variety of power packs which will deliver efficient and reliable cooling.

Cooling Capacity: The cooling capacity of your glycol chiller power pack is a vital step to consider. It determines the quantity of cooling that may be provided and plays an important role in maintaining the desired temperature with your specific application. Look at the cooling capacity requirements based on the size and demands of your cooling system.

System Requirements: Look at the specific requirements of your cooling system. Different applications could possibly have varying needs in terms of temperature range, flow rate, and pressure. Ensure that the power pack you choose meets these requirements to assure optimal performance and longevity.

Energy Efficiency: Look for glycol chiller power packs that happen to be made with energy efficiency in mind. Energy-efficient power packs can help reduce operating costs and reduce environmental impact. Look for models with good-efficiency components boasting for example variable speed compressors.

Reliability and Durability: Select power packs from reputable manufacturers better known for their reliable and sturdy products. Consider the grade of components, construction, and warranty offered. Choosing a reliable and sturdy power pack ensures trouble-free operation and long-term performance.

Compatibility: Be sure the glycol chiller power pack you decide on is compatible with your overall cooling system components. Consider factors like connection options, control compatibility, and integration with some other equipment to make sure seamless operation.

Budget: While cost ought not to be the sole determining factor, it is very important consider your financial budget when choosing a glycol chiller power pack. Balance the upfront cost with all the long term benefits and satisfaction you can expect to receive to produce an informed decision that fits your financial resources.

By carefully considering these factors, you may confidently pick the best glycol chiller power pack that may meet your cooling requirements and deliver efficient and reliable temperature control for the application.

Maintenance and Maintain Your Glycol Chiller Power Pack

To guarantee optimal performance and prolong the lifespan of your own glycol chiller power pack, it is vital to go by proper maintenance and care practices. By implementing the next best practices, you can keep your power pack in excellent condition and prevent any potential problems that may affect its functionality.

  1. Regular Cleaning: A clean power pack is essential for efficient cooling. Regularly clean the outside surfaces from the power pack using a soft cloth or brush, being careful to not damage any components. Remove any dust, dirt, or debris which may have accumulated on the unit.
  2. Monitor Glycol Levels: The glycol solution inside the power pack plays a crucial role to maintain the required temperature. Regularly examine the glycol levels and make certain these are in the recommended range. If possible, increase the glycol answer to keep the optimal level.
  3. Inspect Components: Routinely inspect all aspects of the power pack for any signs and symptoms of wear, damage, or leaks. Check the glycol lines, fittings, valves, and any other connections to make certain they can be secure and functioning correctly. If you notice any issues, address them promptly in order to avoid further damage.
  4. Check Electrical Connections: Safety factors are paramount when confronted with power packs. Regularly inspect the electrical connections and wiring to guarantee they are secure, free from damage, and properly grounded. Any loose or damaged electrical connections needs to be repaired or replaced from a qualified technician.
  5. Schedule Professional Maintenance: While regular cleaning and inspections are very important, additionally it is recommended to schedule professional maintenance to your glycol chiller power pack. Professional technicians is capable of doing in-depth checks, cleanings, and repairs to make certain optimal performance and address any underlying issues that might not be visible to the untrained eye.

By simply following these maintenance and care best practices, you can maximize the lifespan of your glycol chiller power pack and sustain its efficiency in cooling applications. Regular monitoring, cleaning, and inspection can help prevent potential issues and ensure that your power pack is constantly function at its best.

Best Practices for Maintenance:
Regular cleaning of the power pack
Monitoring glycol levels
Inspecting components for wear, damage, or leaks
Checking electrical connections and wiring
Scheduling professional maintenance

Glycol Chiller Power Packs vs. Other Cooling Options

When it comes to optimizing cooling in several applications, there are many options available. Within this section, we shall compare glycol chiller power packs with other cooling options, highlighting their pros and cons.

Two common alternatives to glycol chiller power packs are direct refrigeration and air cooling. Let’s take a good look at how these options stack up against the other.

  1. Glycol Chiller Power Packs: Advantages

    • Efficient temperature control: Glycol chiller power packs offer precise and consistent temperature control, causing them to be well suited for applications where maintaining a certain temperature is vital.
    • Flexibility in system design: These power packs can be customized to put specific cooling requirements, enabling greater flexibility in system design.
    • Suited to long-distance cooling: Glycol chiller power packs are designed for circulating glycol in long lengths of piping, causing them to be appropriate for applications which need cooling over extended distances.
  2. Glycol Chiller Power Packs: Disadvantages

    • Higher initial cost: When compared with other cooling options, glycol chiller power packs could have a higher upfront cost.
    • Regular maintenance: These power packs require regular maintenance to make sure optimal performance and prevent issues including glycol contamination.
    • Additional space requirement: Installing glycol chiller power packs might need more space compared to other cooling options.
  3. Direct Refrigeration:

    • Advantages: Direct refrigeration systems provide quick cooling and are often more inexpensive upfront.
    • Disadvantages: These systems could be limited in terms of temperature control and will not be ideal for applications that require precise temperature maintenance.
  4. Air Cooling:

    • Advantages: Air cooling systems are normally much easier to install and require less maintenance in comparison to glycol chiller power packs.
    • Disadvantages: They may not give you the same measure of temperature control and consistency as glycol chiller power packs, specially in situations where precise temperatures are needed.

To summarize, while glycol chiller power packs incorporate some disadvantages, they provide significant advantages regarding temperature control, system flexibility, and suitability for very long-distance cooling. These factors make them the favorite selection for many applications. However, direct refrigeration and air cooling can be viable alternatives according to specific cooling requirements and budget constraints.

Comparison of Cooling Options Advantages Disadvantages
Glycol Chiller Power Packs Efficient temperature control
Flexibility in system design
Appropriate for long-distance cooling
Higher initial cost
Regular maintenance
Additional space requirement
Direct Refrigeration Quick cooling
Inexpensive upfront
Limited temperature control
May not be ideal for precise temperature maintenance
Air Cooling Easier installation
Less maintenance
Limited temperature control and consistency

Real-World Applications of Glycol Chiller Power Packs

In different industries, including commercial refrigeration, food and beverage production, pharmaceuticals, and more, glycol chiller power packs are extensively used to ensure optimal temperature control. Let’s explore some examples of how these power packs are used in real-world settings:

  1. Commercial Refrigeration: In supermarkets, grocery stores, and restaurants, glycol chiller power packs are instrumental to maintain the optimal temperature for perishable goods. By circulating glycol through refrigeration systems, these power packs help preserve the product quality and freshness of food products.

  2. Food and Beverage Production: Glycol chiller power packs play a significant role inside the food and beverage industry, ensuring the precise temperature control required during manufacturing processes. From cooling ingredients to maintaining ideal fermentation conditions for brewing, these power packs play a role in the creation of high-quality products.

  3. Pharmaceuticals: The pharmaceutical sector will depend on glycol chiller power packs to keep up precise temperature conditions to the production and storage of medications. From vaccine production to pharmaceutical laboratories, these power packs help ensure the integrity of delicate substances along with the efficacy of medical products.

  4. Chemical Processing: Industries involved with chemical processing utilize glycol chiller power packs to manage temperatures in a variety of stages of production. The stability provided by these power packs ensures optimal chemical reactions, efficient processing, and adherence to quality standards.

These examples demonstrate the diverse applications of glycol chiller power packs across different industries. By enabling precise temperature control, these power packs play a role in the development, preservation, superiority an array of products. The flexibility and effectiveness of glycol chiller power packs make them a great asset in numerous real-world scenarios.

Real-World Applications of Glycol Chiller Power Packs

Industry Applications
Commercial Refrigeration Supermarkets, grocery stores, and restaurants: preserving the grade of perishable goods
Food and Beverage Production Ingredient cooling, fermentation control, and temperature-sensitive process oversight
Pharmaceuticals Vaccine production, pharmaceutical laboratories, and storage of medications
Chemical Processing Temperature control for optimal chemical reactions and processing

In Summary

To summarize, glycol chiller power packs give a reliable and efficient solution for optimizing cooling in different applications. Throughout this article, we have now explored the rewards and functionalities of these power packs, emphasizing their importance in maintaining the specified temperature in different cooling systems.

By continuously circulating a glycol mixture, these power packs ensure consistent cooling, causing them to be particularly effective in temperature-sensitive industries like commercial refrigeration, food and beverage production, and pharmaceuticals. The ability to maintain precise temperature control is vital during these settings to guard product quality and prevent spoilage.

Using their easy installation and setup, glycol chiller power packs offer a practical and efficient cooling solution for businesses across industries. By choosing the proper power pack according to cooling capacity, system requirements, and energy efficiency, businesses can optimize their cooling operations and lower energy consumption.

To sum it up, glycol chiller power packs are a crucial component in achieving optimal cooling performance. Their versatility, reliability, and power to optimize cooling efficiency make them an important investment for businesses needing temperature control. By incorporating glycol chiller power packs to their cooling systems, businesses can improve product quality, prolong the lifespan in their equipment, and ultimately enhance customer satisfaction.

FloJet BW5000: Your Water Pumping Companion

Best High Flow Bottle Water Pump for Efficiency

With regards to ensuring efficient water flow with your home or office, buying the ideal high flow bottle water pump is crucial. These flo jet water pumps are meant to offer a steady and powerful stream of water, which makes them perfect for filling large bottles quickly.

Within this comprehensive guide, we shall explore the very best-rated high flow bottle water pumps out there, their advantages, key features to consider, and the ways to install and utilize them for optimal efficiency.

Whether you need a high flow pump for bottles with your home, an electric bottle water pump for convenience, or possibly a portable high flow water pump for on-the-go use, we’ve got you covered. Leave behind slow water transfer and feel the simplicity of a high flow bottle water pump today!

Understanding High Flow Water Pumps in addition to their Advantages

High flow water pumps are specifically designed to supply a large level of water within a short length of time. These pumps are capable of delivering an increased flow rate in comparison to standard water pumps, ensuring quick and efficient water transfer.

The main advantages of high flow water pumps are numerous. They can save effort and time when filling large bottles or containers, improve water circulation in industrial settings, and facilitate faster water distribution in commercial businesses. Additionally, high flow water pumps are frequently more durable and long-lasting than standard pumps, making them a dependable selection for various applications.

Going through the Best High Flow Bottle Water Pump Features

When deciding on the best high flow bottle water pump for your requirements, it’s important to consider several key features:

  1. Flow Rate: The flow rate is an important factor because it determines how quickly the pump can fill bottles or containers. Choose a pump by using a high flow rate to make certain efficient water transfer.
  2. Power Source: Consider the pump’s power source. Electric pumps offer convenience and reliability, while portable options with battery-powered operation provide flexibility for outdoor usage.
  3. Construction and Materials: Take notice of the pump’s construction and materials to make sure durability and longevity.

By considering these important features, it is possible to pick a high flow bottle water pump that meets your specific needs and ensures efficient water transfer for filling large bottles and containers.

High Flow Bottle Water Pump

The high flow bottle water pump is specifically made to provide a simple and efficient water flow for filling large bottles and containers. These pumps are powerful, reliable, and competent at delivering a high flow rate to conserve commitment. With their durable construction and user-friendly design, high flow bottle water pumps can be a must-have for homes, offices, and commercial establishments that require quick and efficient water transfer.

Premier Bottle Water Pumps: Flojet BW5000 as well as others

One of the best high flow bottle water pumps out there, the Flojet BW5000 sticks out like a top-rated choice. This pump provides a high flow rate, durable construction, as well as simple installation and make use of. It was created to provide efficient water transfer for filling large bottles and containers.

In addition to the Flojet BW5000, there are other reliable and highly rated options available, each featuring its unique features and advantages. These pumps have already been tested and recommended by users for their performance, reliability, and overall efficiency.

Installation and employ: Putting Together Your High Flow Pump for Efficiency

Installing and making use of a high flow bottle water pump can be a straightforward process that can be completed by incorporating simple steps. To make certain an even installation and efficient operation, follow this step-by-step guide:

  1. Gather necessary tools and materials: Before you start cellular phone process, make sure you have got all the necessary tools and materials on hand. This could include wrenches, fittings, hoses, and also the high flow pump itself.
  2. Select a suitable water source: Identify a water source that will give you the necessary flow rate for the high flow pump. This is usually a water line in your home or office, a water reservoir, or another suitable water supply.
  3. Connect the pump on the water source: Take advantage of the appropriate fittings and connectors to connect the high flow pump for the chosen water source. Be sure that the connections are secure to stop leaks or loss in water pressure.
  4. Setup the desired hoses or tubing: Based on your unique setup and requirements, you may need to attach hoses or tubing for the inlet and outlet of your high flow pump. Adhere to the manufacturer’s instructions to guarantee proper installation.
  5. Test the pump: When the pump is installed and all connections are properly secured, activate the water source and test the pump to make certain it can be working correctly. Search for any leaks or abnormal noises during operation.
  6. Learn how to use the pump: Fully familiarize yourself with the user manual or instructions offered by the manufacturer to know how to operate the high flow pump efficiently. This may include adjusting flow settings, managing the pump’s power, or any other specific features.
  7. Keep the pump: To ensure optimal efficiency and longevity of your respective high flow pump, perform regular maintenance tasks including cleaning, lubricating, and inspecting for just about any signs and symptoms of wear or damage. Stick to the manufacturer’s guidelines for maintenance and troubleshooting.

Following these installation and usage guidelines, it is possible to set up your high flow pump for optimal efficiency and enjoy the great things about quick and reliable water transfer for filling large bottles and containers.

The Bottom Line

Purchasing the best high flow bottle water pump is a practical and efficient strategy to ensure a steady and powerful water flow in your home or office. These pumps have numerous advantages, leading them to be indispensable for a variety of applications. Their ability to quickly fill large bottles and containers saves time and effort, while their durability and reliability cause them to a trustworthy choice.

In choosing a high flow bottle water pump, it is essential to consider key features including the flow rate, power source, and construction. A high flow rate ensures efficient water transfer, while electric pumps offer convenience and reliability. Additionally, a durable construction ensures longevity, enabling you to enjoy the advantages of a high flow pump for the extended period.

One top-rated option to consider is definitely the Flojet BW5000. This pump offers a high flow rate, boasts a durable construction, which is an easy task to install and make use of. However, there are more reliable and highly regarded options you can find, each using its unique features and advantages.

By knowing the important features, exploring top-rated options, and after the installation and usage guidelines, you are able to harness the power of high flow water pumps for easy efficiency. Bid farewell to slow water transfer and relish the convenience and effectiveness of your high flow bottle water pump today.

Watts Fittings Quick Connect: Hassle-Free Plumbing

Quality Watts Sea Tech Connector Fittings for Boats

If you’re looking for reliable and secure marine fittings to your boat’s plumbing system, take a look at Watts Sea Tech Connector Fittings. Extremely high-quality fittings have earned a reliable reputation among boat builders, marine distributors, and RV customers worldwide. With their robust construction and adherence to industry standards, Watts Sea Tech Connector Fittings provide durable and efficient connections for a number of water systems on boats and marine vessels.

Available in both inch (Imperial) and metric formats, watts fittings can be found in various diameters, causing them to be suitable for a wide range of applications. Whether you require fittings for potable water, washdown systems, live well systems, or cold and warm water lines, these fittings offer a reliable solution for your plumbing needs.

Installation and maintenance are hassle-free with Watts Sea Tech Connector Fittings. These are works with copper, PEX, and CPVC pipes, as well as their convenience ensures quick and secure connections. Plus, using their certification to ANSI, NSF, and ASTM standards, these fittings meet or exceed all ABYC and RVIA standards, guaranteeing their durability and satisfaction on your boat.

Improve your boat’s water systems together with the quality and gratifaction of Watts Sea Tech Connector Fittings. Trust the amount one choice for marine fittings and experience assurance on the water.

Introducing Watts Sea Tech Connector Fittings

Watts Sea Tech Connector Fittings have cemented their position as the go-to selection for boat builders, marine distributors, and RV customers across the globe. These fittings provide reliable and secure connections for many different marine applications, including potable water, washdown systems, live well systems, plus more. Whether you’re an expert boat builder or even a proud boat owner, Watts Sea Tech Connector Fittings offer reassurance because of their trusted performance and exceptional durability.

Watts Sea Tech Connector Fittings may be found in a wide array of sizes, ensuring they could match the unique plumbing needs of the boat or marine vessel. The fittings are compatible with different pipe materials, causing them to be incredibly versatile. Using their high-quality construction, these marine fittings deliver lasting performance in even harshest marine environments.

Advantages of Choosing Watts Quick Connect Fittings

Watts Quick Connect Fittings provide several key benefits for boat owners and marine professionals. These fittings are designed to simplify cellular phone and maintenance process, offering convenience and efficiency.

  1. Tool-Free Installation and Maintenance: One of your primary features of Watts Quick Connect Fittings is push-to-connect design. This eliminates the need for tools, enabling quick and easy installation without the hassle of traditional threaded fittings or soldered joints. Simply push the pipes or tubing into the fitting until they lock in position, saving both commitment.
  2. Reduced Chance of Leaks and Callbacks: With their secure push-to-connect design, Watts Quick Connect Fittings provide reliable connections that minimize the danger of leaks. This will help to prevent callbacks and ensure the integrity of the boat’s plumbing system, giving boat owners and marine professionals peace of mind.
  3. Compatibility with assorted Pipe Materials: Watts Quick Connect Fittings are compatible with different pipe materials, including copper, PEX, and CPVC. This versatility means they are appropriate for a wide array of boat plumbing systems, providing flexibility and convenience for marine applications.
  4. Locking Clip and Zero-Leak O-Ring Guide: Watts Quick Connect Fittings have a locking clip, which adds an additional layer of security for the connection. This ensures a good and secure fit, reducing the risk of accidental disconnection. Additionally, these fittings feature a zero-leak O-ring guide, further enhancing their performance and reliability.
  5. Certified to Industry Standards: Watts Quick Connect Fittings are certified to ANSI, NSF, and ASTM standards, guaranteeing their quality and adherence to industry requirements. This certification helps to ensure that the fittings meet or exceed the essential standards for reliable performance in marine environments.

By choosing Watts Quick Connect Fittings, boat owners and marine professionals can savor the benefits associated with easy installation, secure connections, compatibility with different pipe materials, and satisfaction knowing that the fittings meet industry standards.

Benefits associated with Watts Quick Connect Fittings
Tool-Free Installation and Maintenance
Reduced Risk of Leaks and Callbacks
Compatibility with Various Pipe Materials
Locking Clip and Zero-Leak O-Ring Guide
Certified to Industry Standards

Installation and Maintenance

Installing and looking after Watts Quick Connect Fittings is effortless, as a result of their user-friendly design. With these fittings, it is possible to connect pipes and tubing without making use of any tools. Simply push the pipes or tubing in to the fitting until they lock in place. To disconnect, just press the discharge collar and pull the pipe or tubing out.

For the proper connection, it is important to be sure that the pipes are cut cleanly and free from the burrs or debris. This can ensure a good and leak-free connection. Regular maintenance involves checking for almost any signs of leaks or damage and promptly replacing any fittings that show warning signs of wear.

Created to provide long-lasting performance with minimal effort, Watts Quick Connect Fittings are the ideal selection for boat owners and marine professionals.

Watts Sea Tech Connector Fittings Performance

Watts Sea Tech Connector Fittings are made and manufactured to deliver high end in marine environments. These fittings are rigorously tested to meet ANSI, NSF, and ASTM standards, ensuring their durability and reliability.

Making use of their robust construction and zero-leak O-ring guide, specifically designed for your Plastic Series, Watts Sea Tech Connector Fittings give a secure connection that may withstand high pressures and prevent leaks. This ensures the integrity of the boat’s water system and promotes smooth operation.

Whether you want fittings for potable water systems, washdown systems, or any other marine plumbing application, Watts Sea Tech Connector Fittings deliver consistent performance to satisfy your distinct needs. Trust the quality and reliability of Watts Sea Tech Connector Fittings to maintain your boat’s water systems working efficiently, no matter what conditions.

Watts Fittings Quick Connect Advantages

Watts Fittings Quick Connect offers several advantages over traditional threaded fittings or soldered joints. Firstly, these fittings eliminate the need for tools, making installation and maintenance quick and hassle-free. The push-to-connect design permits easy and secure connections without the risk of leaks or callbacks.

Watts Fittings Quick Connect are compatible with various pipe materials, including copper, PEX, and CPVC, providing versatility and adaptability for a variety of boat plumbing systems. You can trust the reliability and satisfaction of Watts Fittings Quick Connect in your marine applications.

These fittings feature a locking clip for added connection security, ensuring peace of mind during the water. For even more confidence, the Plastic Number of Watts Fittings Quick Connect features a zero-leak O-ring guide that enhances performance and prevents leaks.

Choose Watts Fittings Quick Connect for your personal boat plumbing needs and experience reliable performance and ease of use.

Compatibility and Certification

Watts Sea Tech Connector Fittings are designed to be appropriate for various pipe materials popular in boat plumbing systems. They seamlessly assist copper, PEX, and CPVC pipes, making sure that boat owners can readily find suitable fittings for specific needs. The compatibility of Watts Sea Tech Connector Fittings allows for versatile usage in numerous marine applications, leading them to be an ideal choice among boat builders, marine distributors, and boat owners.

Along with their compatibility, Watts Sea Tech Connector Fittings are certified and tested to satisfy and exceed the stringent standards set by ANSI, NSF, and ASTM. These fittings also abide by all ABYC (American Boat & Yacht Council) and RVIA (Recreation Vehicle Industry Association) standards, guaranteeing their quality, durability, and gratification. By choosing Watts Sea Tech Connector Fittings, boat owners may have confidence inside the reliability of their water system connections, knowing they are using fittings that meet the highest industry certification standards.

When it comes to boat plumbing fittings, it is crucial to prioritize compatibility and certification. Watts Sea Tech Connector Fittings offer the perfect combination of both, ensuring a good and reliable connection to your boat’s water systems.

Conclusion

Change your boat’s water systems with all the top choice in marine fittings – Watts Sea Tech Connector Fittings. Trusted by boat builders, marine distributors, and boat owners worldwide, these fittings offer reliable performance and ease of installation. Making use of their compatibility with some other pipe materials, including copper, PEX, and CPVC, Watts Sea Tech Connector Fittings offer a secure and efficient solution for boat plumbing systems.

Whether you want fittings for potable water, washdown systems, or any other marine applications, Watts Sea Tech Connector Fittings deliver reassurance. They may be certified in order to meet ANSI, NSF, and ASTM standards, ensuring their durability and quality. Bid farewell to leaks and callbacks and say hello to reliable connections that exceed industry requirements.

Don’t be happy with anything below the ideal in push-to-connect fittings. Choose Watts Sea Tech Connector Fittings to further improve your boat’s water systems and enjoy the difference in performance and quality. Upgrade with certainty and like the reliability that only Watts Sea Tech Connector Fittings provides.